Running Kubernetes on minikube and using authentication with Azure AD
April 2018
Intro
I was asked to investigate how to authenticate our proof of concept Kubernetes (K8s) cluster with our Active Directory.
One of the nice to have requirements was to make it not reliant on our internal network where are AD servers reside. We sync our AD with Azure AD so it would be great if this could be used as authentication to a Kubernetes cluster and it can be done.
I was using minikube for testing, which is a great way to get up and running quickly with K8s so this post will show you how to configure k8s running on minikube to authenticate with Azure AD.
Once you get the work flow with minikube, it is straight forward to set it up with a K8s cluster hosted elsewhere.
Azure AD applications
We need two Azure AD apps:
- For the kube-apiserver
- For kubectl, the kubernetes commandline client
Kube server API application
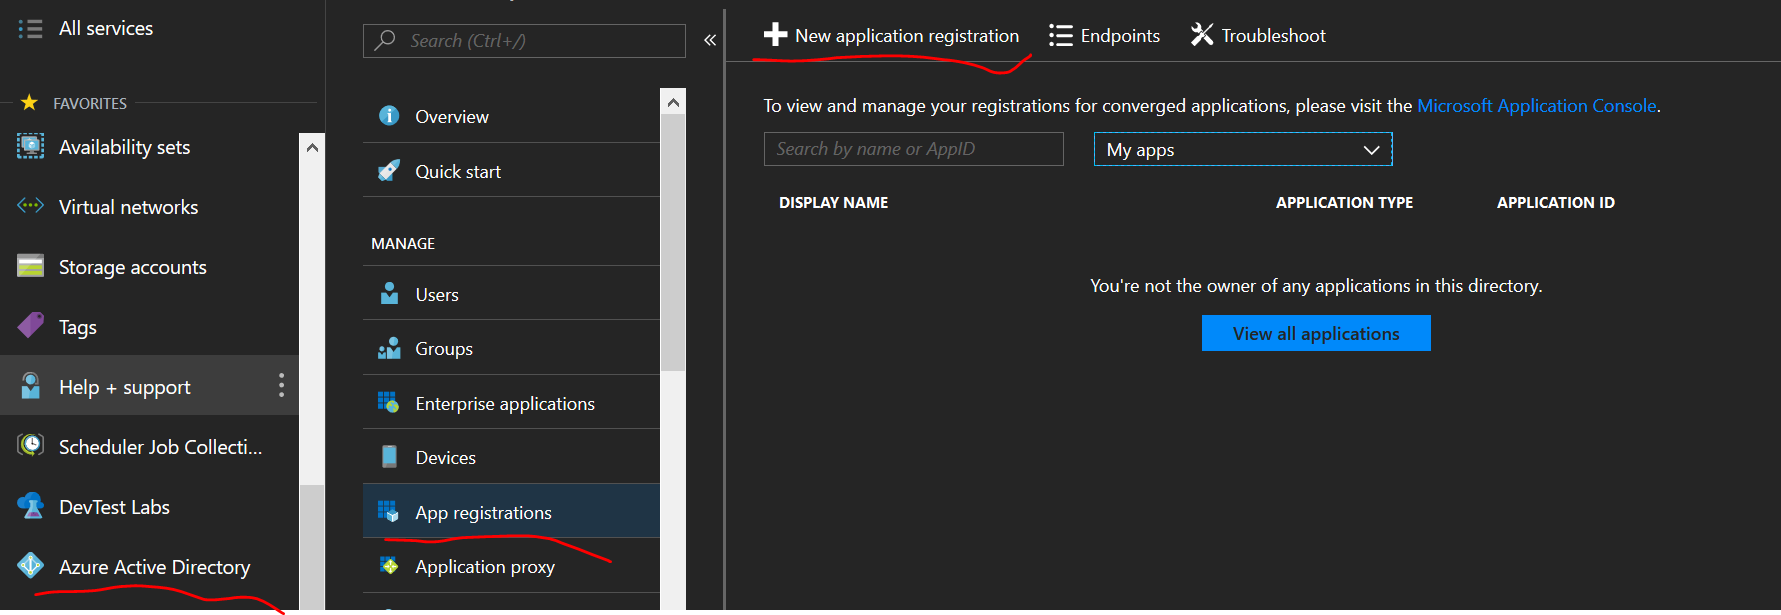
- Sign into the Azure Portal
- Select the Azure Active Directory Blade
- Select App registrations
- Click New application registration
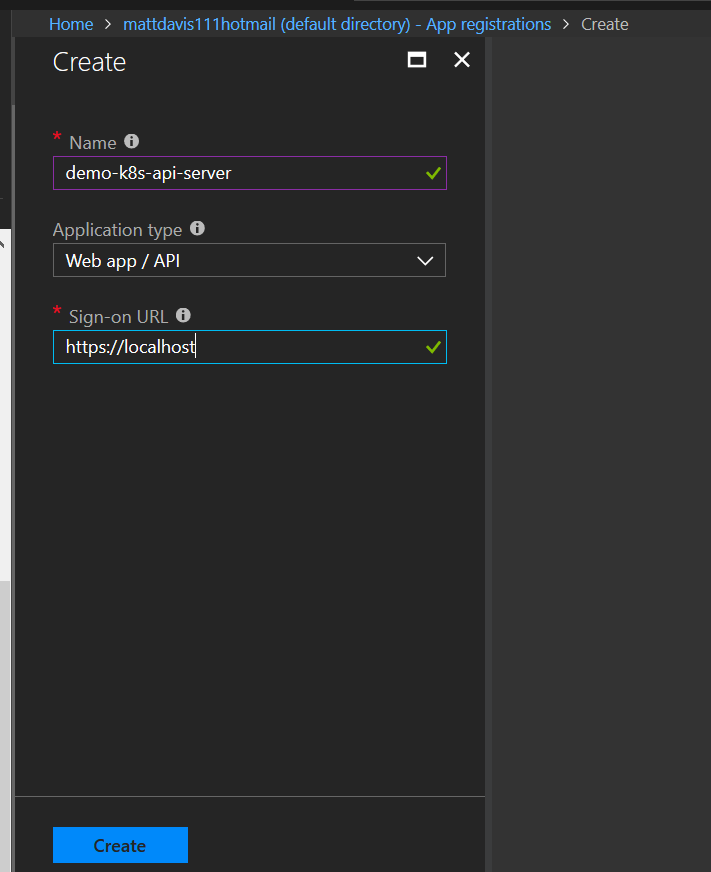
- Name: demo-k8s-api-server
- Application type: Web app / API
- Sign-on URL: https://localhost
- Click Create
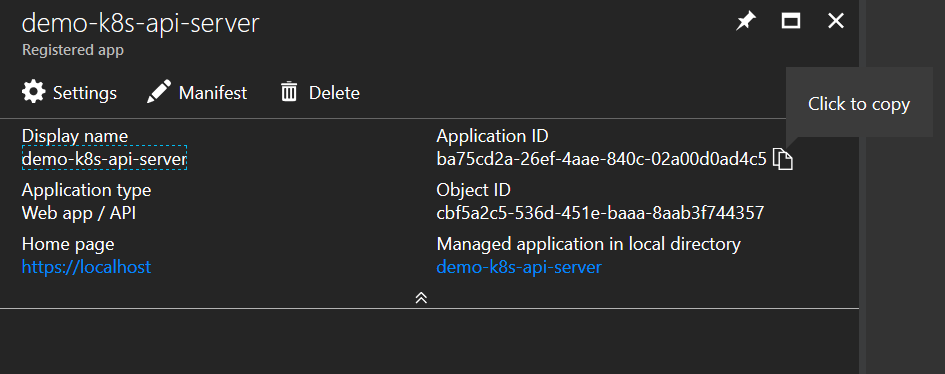
Copy the application id and make a note of it
Api server = ba75cd2a-26ef-4aae-840c-02a00d0ad4c5
Kubectl app
Same as api server app:
- Select the Azure Active Directory Blade
- Select App registrations
- Click New application registration
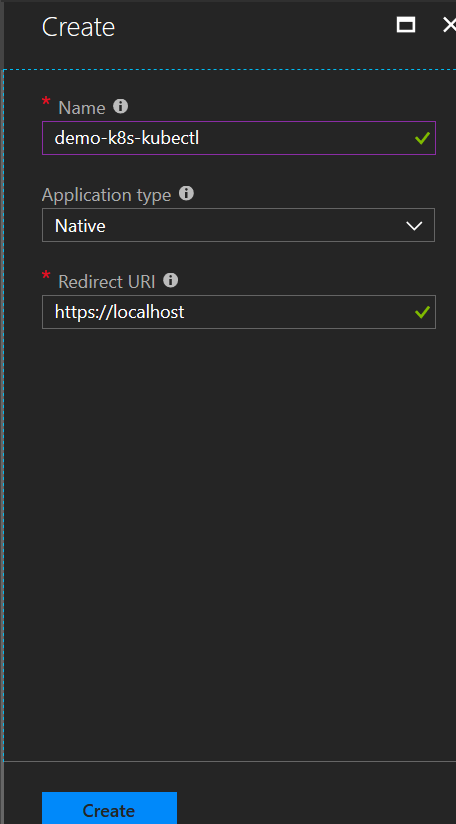
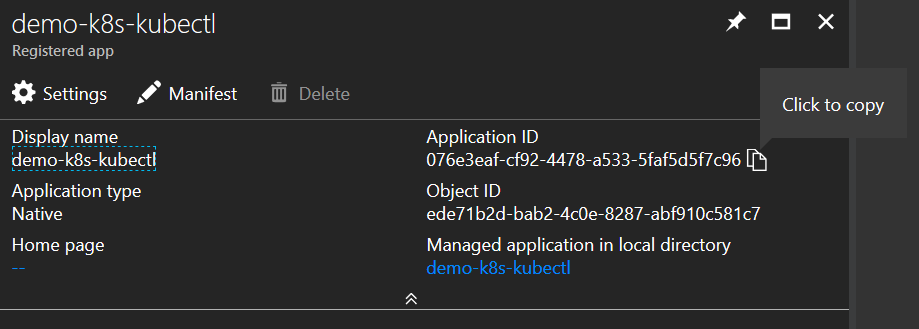
Fill out: Name: demo-k8s-kubectl Application type: Native Redirect URI: https://localhost Click Create
Copy the application id and make a note of it
Kubectl = 076e3eaf-cf92-4478-a533-5faf5d5f7c96
App Permissions
Allow the kubectl app access to the Server API app
In the demo-k8s-kubectl app (from the screen where you copied the application ID in the previous step)
- Click Settings
- Required Permissions
- Add
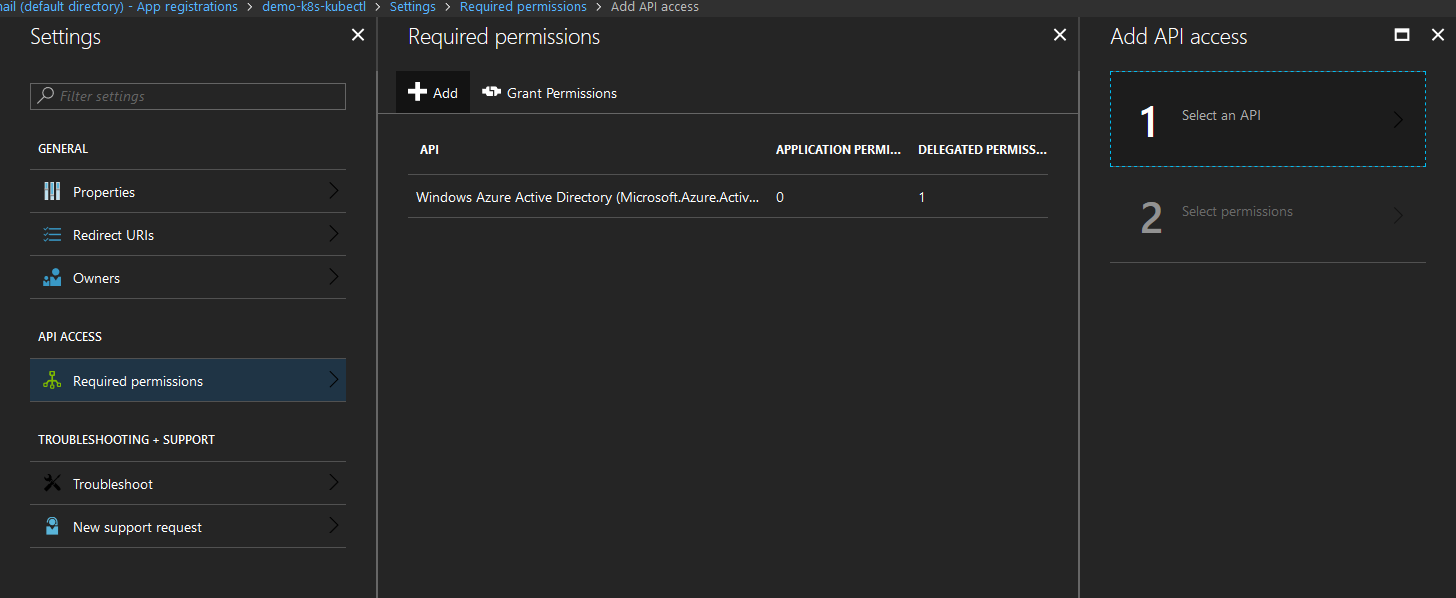
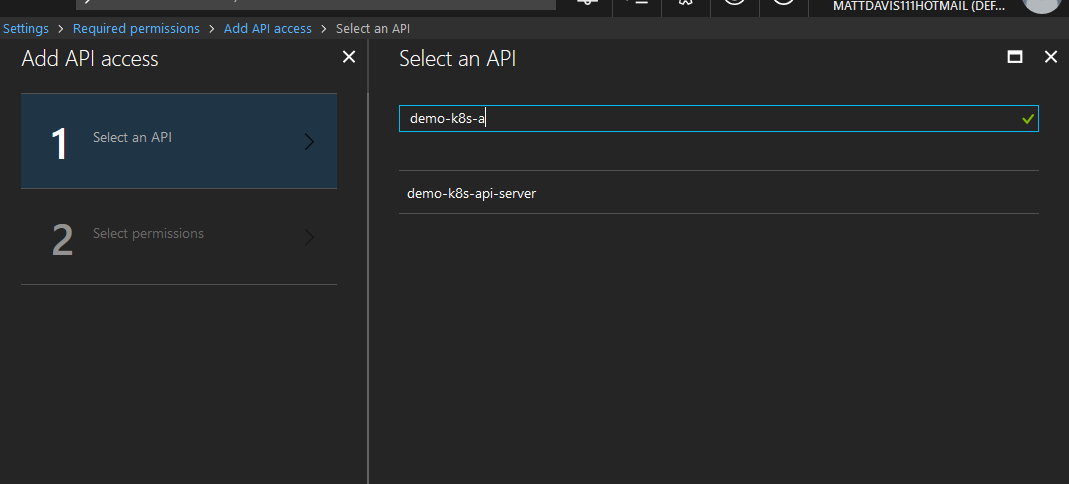
Select the API server previously created
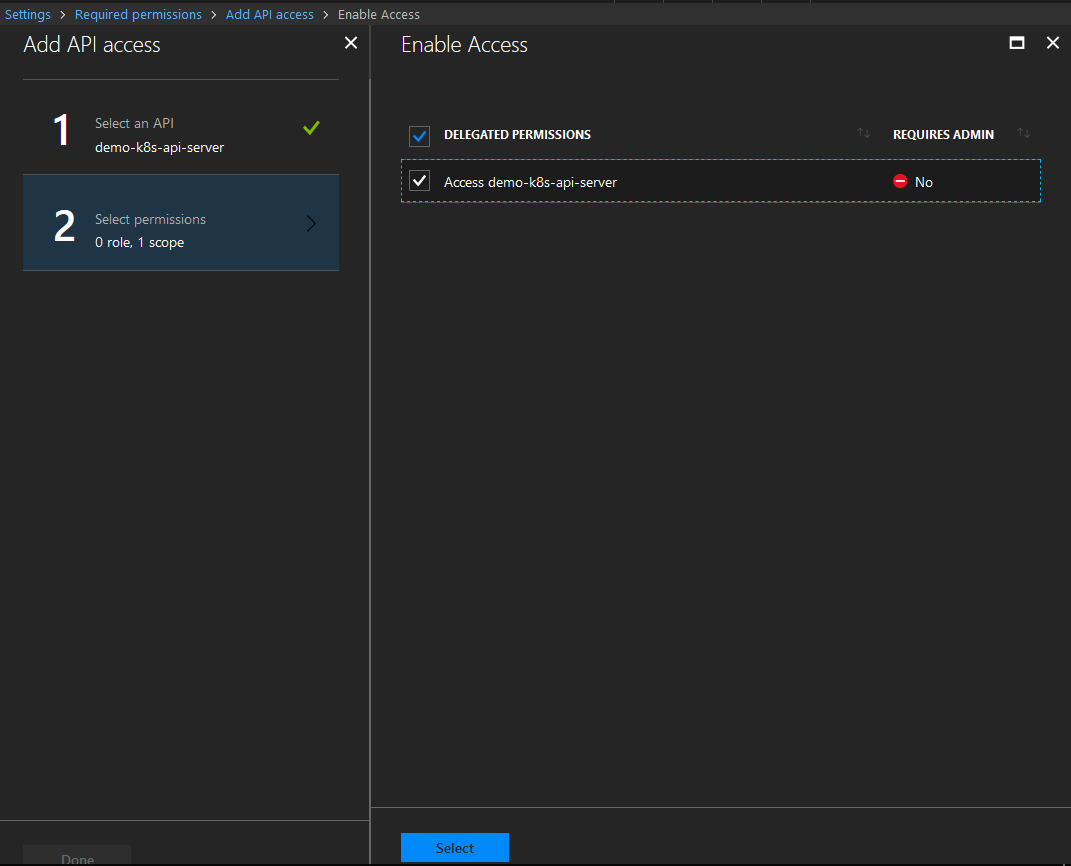
Check the box to delegate permissions and click Select, then Done
Minikube
We need the following info to start the minikube instance so that is will use Azure AD creds and RBAC permissions:
- Api Server application ID (noted ealier if not retrieve from the portal)
- Azure tenant ID (can be found in Azure AD properties blade or by entering your domain name in whatismytenantid site)
To start minikube, run the following, replacing
This is an example running in a bash shell:
minikube start \
--extra-config=apiserver.Authentication.OIDC.ClientID="spn:<API Server Application ID>" \
--extra-config=apiserver.Authentication.OIDC.IssuerURL="https://sts.windows.net/<Azure TenantID>/" \
--extra-config=apiserver.Authentication.OIDC.UsernameClaim="upn" \
--extra-config=apiserver.Authorization.Mode=RBAC
To run on PowerShell when using Windows:
minikube start `
--extra-config=apiserver.Authentication.OIDC.ClientID="spn:ba75cd2a-26ef-4aae-840c-02a00d0ad4c5" `
--extra-config=apiserver.Authentication.OIDC.IssuerURL="https://sts.windows.net/65d6a2c3-6dcd-476e-82a4-12c230cf80b5/" `
--extra-config=apiserver.Authentication.OIDC.UsernameClaim="upn" `
--extra-config=apiserver.Authorization.Mode=RBAC

Grant access to the cluster
When minikube first starts up, we are using the super user to authenticate with the generated certificate. You can view the kubectl config file:
cat ~/.kube/config
To allow other users to authenticate and access the server with RBACa, we have to create cluster role bindings for them. The following will create the user as a cluster-admin.
You can see the other roles avaliable here.
Note you need the # sign after the tenantid and /
kubectl create clusterrolebinding azure-ad-admin --clusterrole=cluster-admin --user=https://sts.windows.net/<tennantID>/#username
For the example, I have a user created in my Azure AD called k8-demo
kubectl create clusterrolebinding azure-ad-admin --clusterrole=cluster-admin --user=https://sts.windows.net/65d6a2c3-6dcd-476e-82a4-12c230cf80b5/#[email protected]

Note
To allow the minikube dashboard to run under RBACs, run:
kubectl create clusterrolebinding add-on-cluster-admin --clusterrole=cluster-admin --serviceaccount=kube-system:default
Kubectl settings
To use Azure AD to authenicate, we need to add the following details to the kubectl config file:
kubectl config set-credentials username `
--auth-provider=azure `
--auth-provider-arg=apiserver-id=api-server-azure-ad-app-id `
 --auth-provider-arg=client-id=kubectl-azure-ad-app-id `
--auth-provider-arg=tenant-id=azure-tenant-id
Example using PowerShell:
kubectl config set-credentials [email protected] `
--auth-provider=azure `
--auth-provider-arg=apiserver-id=ba75cd2a-26ef-4aae-840c-02a00d0ad4c5 `
 --auth-provider-arg=client-id=076e3eaf-cf92-4478-a533-5faf5d5f7c96 `
--auth-provider-arg=tenant-id=65d6a2c3-6dcd-476e-82a4-12c230cf80b5

You can view the user in the kubectl config file:
cat ~/.kube/config
Login via Azure AD
Now to run and you’ll be prompted to open up the Microsoft login site and copy the code displayed in the terminal
kubectl get nodes -user=aduser

Enter the code displayed in the terminal

Login and allow access to the app and close the browser
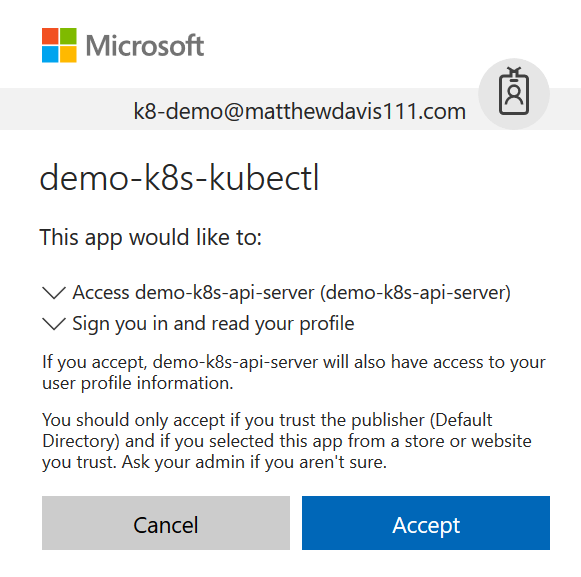
Once you have authenticated:
