Create VM images in Azure with Packer
October 2019
Overview
Packer is a free Open Source tool created by Hashicorp that allows you to build custom Virtual Machine (VM) or container images for a variety of platforms including AWS, Vagrant, Virtual Box and Azure.
I have been creating custom images for AWS for a while and went through the same process for Azure to see the difference and work out how to get to get started and build custom VM images for Azure.
Below are notes from successfully building images for Azure using a basic packer template that will create a custom Ubuntu image with nginx installed.
Packer has different builders that can be used to target different platforms (you can also use multiple builders in the same template). The Packer Azure builder documentation is well written and provide lots of details on the options available for the Azure platform, including the extra step needed for Azure to deprovision the VMs as part of the process.
This was run using Ubuntu 18.04 LTS, with PowerShell Core 6.2.3, Azure CLI version 2.0.74, Packer 1.4.4 and also tested on Windows 10 with PowerShell Core 6.2.3 and Packer 1.4.4.
Warning the resources created in this post will cost money / credits, from creating these images and standing up small VMs over the course of a week my cost was around £3, so not much if you use small VM sizes (one of the advantages of running headless linux servers - less overhead).
Set up
- Packer install guide
- PowerShell Core install guide
- Azure CLI install guide
- PowerShell AZ module install guide
Authentication
You can authenticate to Azure for building with packer 2 ways:
- Interactive authentication
- A service principal
The method packer uses depends on the environment variables that are set in the shell when the Packer build command is run.
Interactive
The Packer Azure builder will prompt you to authenticate via a web browser if you have the following 3 pieces of information referenced in the template:
- subscription_id
- managed_image_name
- resource_group_name
These can be set directly in the template, however it is better practice to set the via Environment variables as shown below.
To set the environment variables in bash:
# set env variables for interactive logon
export ARM_SUBSCRIPTION_ID=xxxxx-xxxx-xxxx-xxx-xxx
export MANAGED_IMAGE_NAME=ubuntu-18-04-lts-nginx
export RESOURCE_GROUP_NAME=packerImageBuilds
To set the environment variables in PowerShell:
$env:ARM_SUBSCRIPTION_ID='xxxxx-xxxx-xxxx-xxx-xxx'
$env:MANAGED_IMAGE_NAME='ubuntu-18-04-lts-nginx'
$env:RESOURCE_GROUP_NAME='packerImageBuilds'

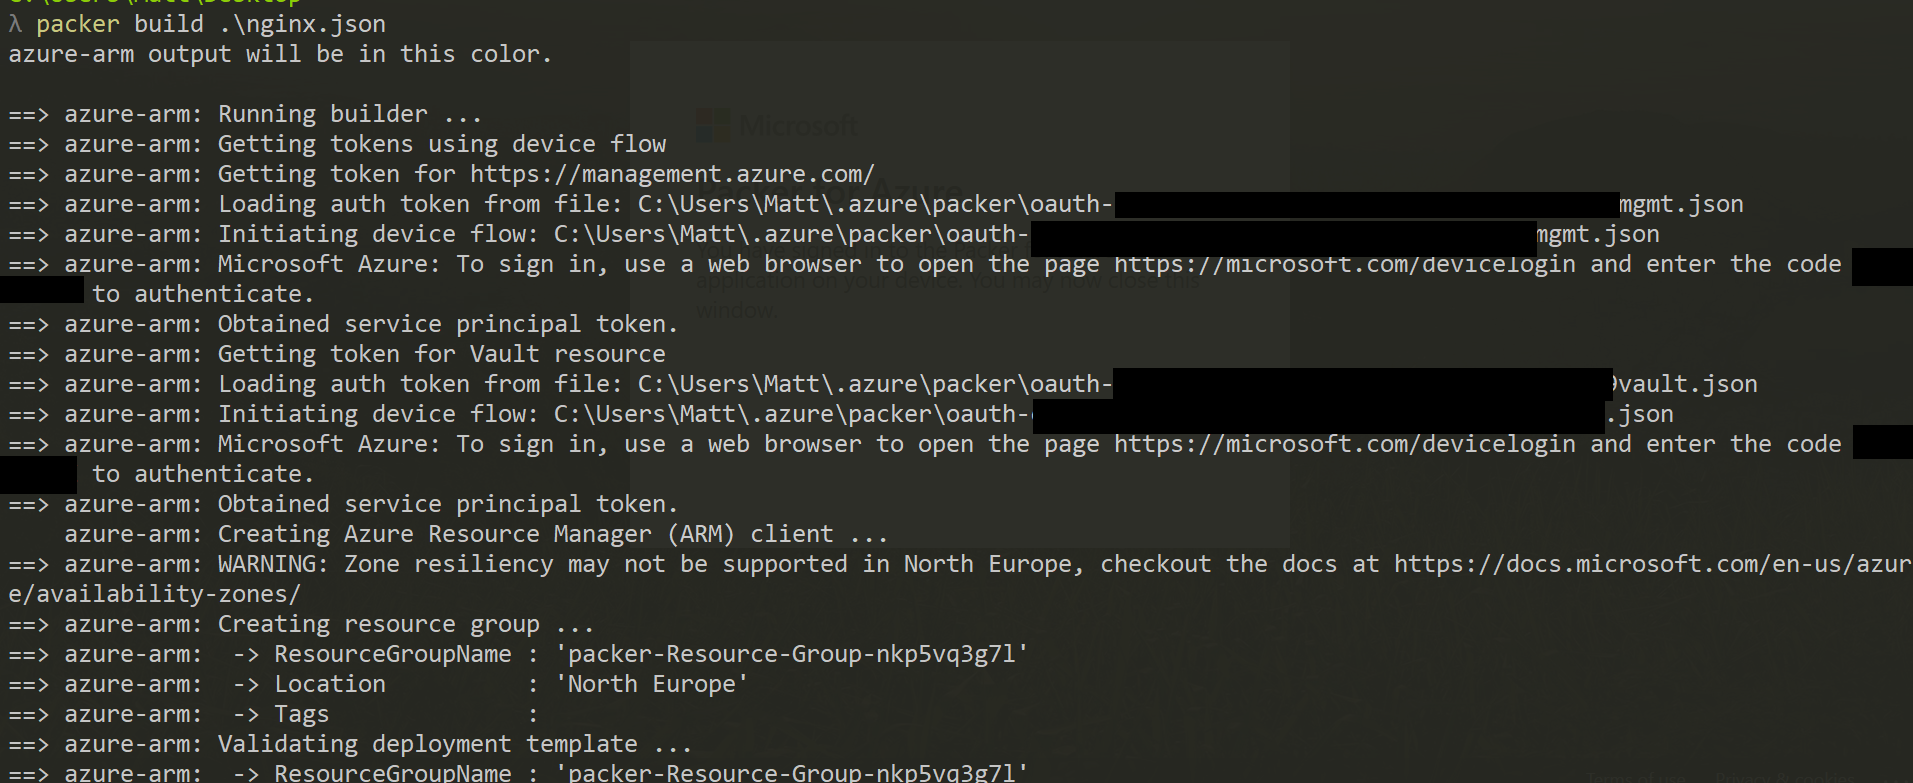
When you run packer build, a code and web address will be shown for you to authenticate with and once successful and token will be issued and you’ll be able to run the build.
packer build ./azure-ubuntu-nginx-packer.json
Running on linux:

Running on Windows:

Azure Service Principal
An Azure Service Principal should be created for automation purposes. Details on how to create the service principal can be found in the azure documentation.
As this is my own account for testing, I gave the service principal contributor role access to my subscription via the Azure CLI but for a production account, a customised RBAC should be used so the service principal just has the right amount of privilege required to run the builds and create the images. An even better way would be to use a separate Azure subscription for Packer build purposes and the images can be uploaded to an Azure shared image library and can be used by other subscriptions and tenants.
az ad sp create-for-rbac -n "Packer-Matt-Visual-Studio-Subscription-Only" --role contributor --scopes /subscriptions/xxxxxxxx-xxxxxxx-xxxxx-xxxxx-xxxxxxx
Once the service principal is created, the tenant ID, Client ID and client secret need to be provided to use the service principal instead of being prompted to sign in interactively.
To set the environment variables in bash:
# set environment variables for service principal

export ARM_CLIENT_ID=xxxxx-xxxx-xxxx-xxx-xxx
export ARM_CLIENT_SECRET=xxxxx-xxxx-xxxx-xxx-xxx
export ARM_SUBSCRIPTION_ID=xxxxx-xxxx-xxxx-xxx-xxx
export ARM_TENANT_ID=xxxxx-xxxx-xxxx-xxx-xxx
export MANAGED_IMAGE_NAME=ubuntu-18-04-lts-nginx
export RESOURCE_GROUP_NAME=packerImageBuilds
To set the environment variables in PowerShell:
$env:ARM_CLIENT_ID='xxxxx-xxxx-xxxx-xxx-xxx'
$env:ARM_CLIENT_SECRET='xxxxx-xxxx-xxxx-xxx-xxx'
$env:ARM_SUBSCRIPTION_ID='xxxxx-xxxx-xxxx-xxx-xxx'
$env:ARM_TENANT_ID='xxxxx-xxxx-xxxx-xxx-xxx'
$env:MANAGED_IMAGE_NAME='ubuntu-18-04-lts-nginx'
$env:RESOURCE_GROUP_NAME='packerImageBuilds'
Resource Group for Packer images
An Azure resource group is required before the packer build runs to store the images that are created.
A resource group can be created in the portal, by the az cli or PowerShell as shown below.
$packerRGName = 'packerImageBuilds'
$tags = @{'Environment' = 'Dev'; 'Description' = 'Resource group where images built by packer are stored' }
$resourceGroup = New-AzResourceGroup -Name $Name -Location $location -Tag $tags -Verbose
# cli
az group create --location northeurope --name packerImageBuilds --tags 'Environment=Dev' 'Description=Images produced by Packer builds'
Variables in the Packer template
Below is an example of how the environment variables are passed to the packer template (this is for a service principal). Environment variables are passed to the variables set at the top of the packer template and then they become ‘user’ variables and passed to the builders.
{
  "variables": {
    "client_id": "",
    "client_secret": "",
    "subscription_id": "",
    "tenant_id": "",
    "managed_image_name": "",
    "resource_group_name": ""
  },
  "builders": [
    {
      "type": "azure-arm",
      "client_id": "",
      "client_secret": "",
      "tenant_id": "",
      "subscription_id": "",
      "managed_image_resource_group_name": "",
      "managed_image_name": "",
  ........ continued
Packer Template
Below is a complete packer template called azure-ubuntu-nginx-packer.json that will create a custom Ubuntu 18.04 LTS image with nginx installed for Azure.
"async_resourcegroup_delete": true
This line set to true speeds up the delete process, the docs say there is a changes that build resources could be left undeleted as it doesn’t wait to verify that all resources are deleted but I didn’t notice anything left after running a few builds.
packer build azure-ubuntu-nginx-packer.json
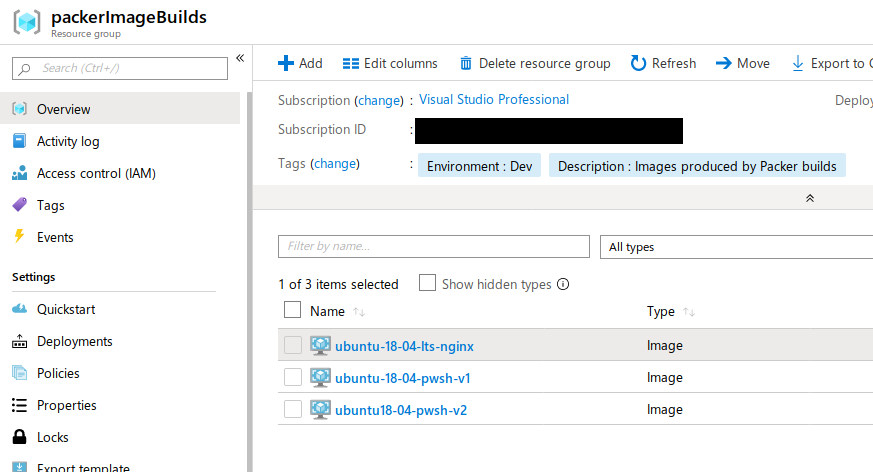
After running a successful build, an image is created in the resource group set in the RESOURCE_GROUP_NAME environment variable (packerImageBuilds from the code samples shown above).

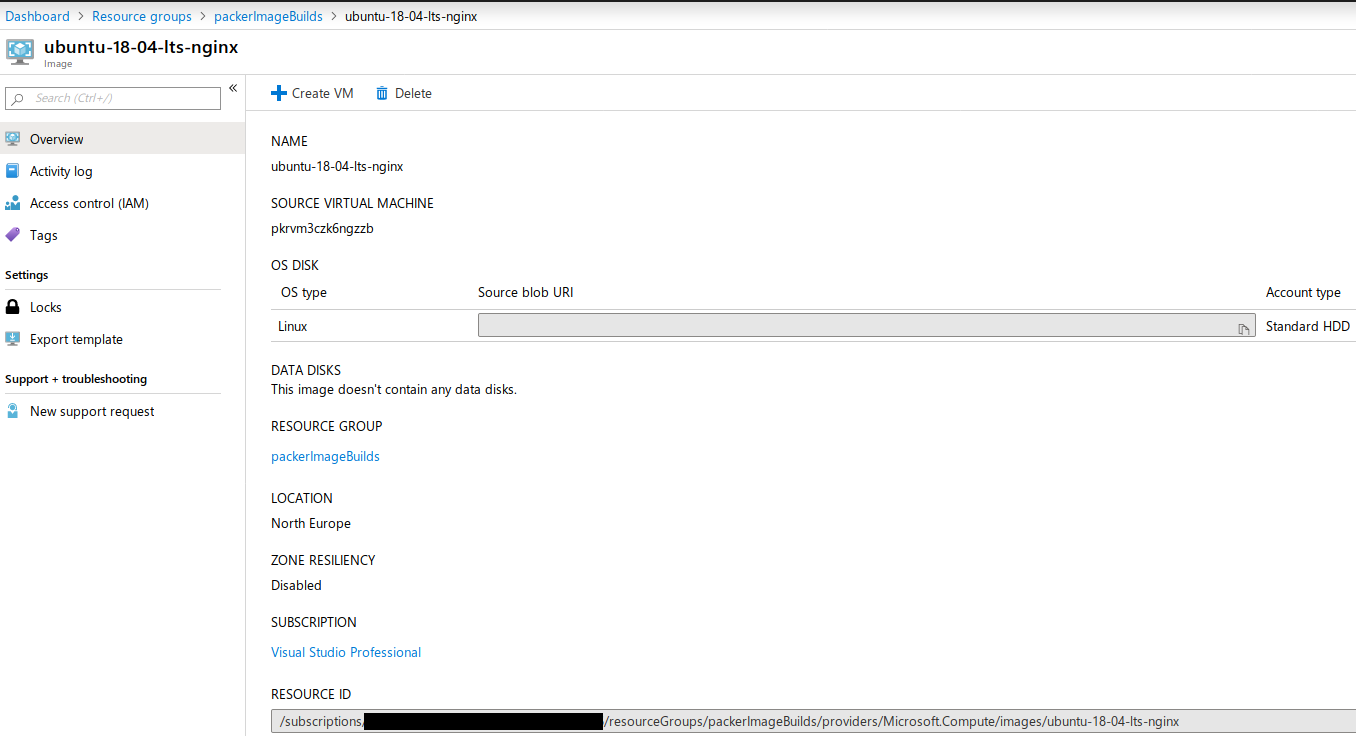
Clicking on the image shows the details of the image and gives you the option to create a VM from that image.

Below is a small VM that was created directly from the image that allows port 80 through the security group so the default nginx welcome page is displayed on the public IP address.

The nginx welcome page

Every time this image is used to create a VM, nginx will be running by default (basic example. This can be used as the default image to create VMs in a load balancer etc.
Azure Shared image repo
As mentioned earlier, a good way to segregate Packer builds would be to run them in their own Azure subscription and use an Azure share image repository to share the built images with certain subscriptions and even different tenants.
First step is to create an Azure image repository. This can be done via the portal, Azure CLI or PowerShell (example below)
# create shared image gallery

$Name = 'packerImageGallery'
$location = 'northeurope'
$tags = @{'Environment' = 'Dev'; 'Description' = 'Resources for packer image builds' }

$resourceGroup = New-AzResourceGroup -Name $Name -Location $location -Tag $tags -Verbose
$gallery = New-AzGallery -GalleryName $Name -ResourceGroupName $Name -Location $location -Description 'Shared Image Gallery for packer builds' -Tag $tags -Verbose

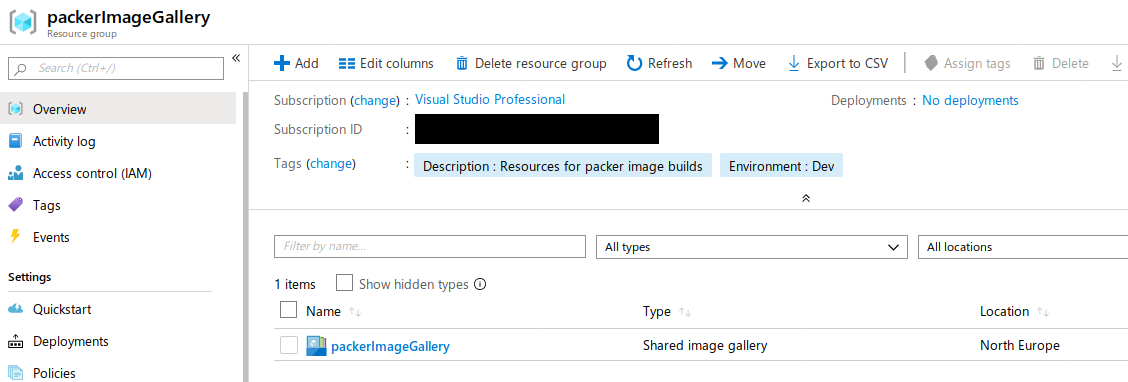
After the operation is completed, you’ll be able to see the shared image gallery in the specified resource group.

Next an image definition is required, this will be referenced in the packer template to upload the image to the gallery.
$Name = 'packerImageGallery'
$location = 'northeurope'
$imageName = 'ubuntu-18-04-lts-nginx'

$params = @{
  GalleryName       = $Name
  ResourceGroupName = $Name
  Location          = $location
  Name              = $imageName
  OsState           = 'generalized'
  OsType            = 'Linux'
  Publisher         = 'matt'
  Offer             = 'Webserver
  Sku               = $imageName

}

New-AzGalleryImageDefinition @params
Below is the script to build the same image as before but to upload it the shared image gallery. There are extra environment variables for the image gallery including the resource group of the image gallery, the image gallery name and version to upload.
Environment variables
$env:ARM_CLIENT_ID = 'xxxx-xxxx-xxxx-xxxx'
$env:ARM_CLIENT_SECRET = 'xxxx-xxxx-xxxx-xxxx'
$env:ARM_SUBSCRIPTION_ID = 'xxxx-xxxx-xxxx-xxxx'
$env:ARM_TENANT_ID = 'xxxx-xxxx-xxxx-xxxx'
$env:MANAGED_IMAGE_NAME = 'ubuntu-18-04-lts-nginx'
$env:GALLERY_NAME = 'packerImageGallery'
$env:GALLERY_RESOURCE_GROUP = 'packerImageGallery'
$env:MANAGED_IMAGE_RESOURCE_GROUP = 'packerImageBuilds'
$env:IMAGE_VERSION = '1.0.0'
Code snippet from the packer build template specifically for the image upload to the gallery.
"shared_image_gallery_destination": {
        "resource_group": "",
        "gallery_name": "",
        "image_name": "",
        "image_version": "",
        "replication_regions": "northeurope"
      },
      "managed_image_name": "",
      "managed_image_resource_group_name": ""
replication_regions I set this to northeurope which is the same location as the shared gallery because I don’t want the image to replicate. For redundancy you can specify multiple regions in a list.
A managed image name and resource group is still required to upload the completed image even though you are saving the image to the shared gallery at the same time.
Full Packer template for shared image
Sharing with the image gallery
The images stored within the image gallery can be shared with different service principals, Azure AD users and Azure AD groups according to the documentation. The reader role IAM permission is required to access images from the gallery, below is an example of giving an AD group reader permissions to the gallery:
$galleryName = 'packerImageGallery'
$rgName = 'packerImageGallery'

# Get the object ID for the group
$groupId = (Get-AzADGroup -DisplayName 'az-dg-image-gallery-readers').Id

# Grant reader access to the gallery
$params = @{
  ObjectId           = $groupId
  RoleDefinitionName = 'Reader'
  ResourceName       = $galleryName
  ResourceType       = Microsoft.Compute/galleries
  ResourceGroupName  = $rgName
}

New-AzRoleAssignment @params
The id of the image is required to be able to use it in another subscription.
$Name = 'packerImageGallery'
$ImageName = 'ubuntu-18-04-lts-nginx'

Get-AzGalleryImageVersion -GalleryName $Name -ResourceGroupName $Name -GalleryImageDefinitionName $imageName | Select-Object -Property id | Format-List

I have created two versions in the above example.
To use the image in a build, specify the ID you want to create the VM from, providing the user or service principal who is creating the VM has reader access to the shared gallery, a VM will be created in the target subscription with that image.
Below is an example of a terraform variables file that uses an image created and stored in the gallery.

Summary
Getting Packer working with Azure didn’t take too long once reading through the documentation and a bit of trial and error with the settings. I thought I’d be able to upload directly to a shared image gallery without the need of also uploading to a resource group, but this wasn’t the case. I also didn’t want to replicate the image, so thought putting null as the value for the replication would work but it turned out you had to specify an actual region and to not replicate the image, that had to be the same one as the image gallery you were uploading to.
Packer works well with Azure and the shared image gallery is a nice feature that allows you to organise and version you VM images and all of this could easily be implemented in a build process to automate the updating and uploading of images with the service principal.
All in all a good experience and one that I will use in the future due to getting a certain amount of Azure credit each month to spend to experiment with.