Create AWS EC2 instance with a custom volume size
March 2019
Overview
There are plenty of examples on how to create a basic EC2 instance with PowerShell in AWS, the built in help from the AWS module gives a perfect example on how to quickly get one up and running. However creating an EC2 instance this way means you get the default volume size of the specified AMI, usually 8GB for Linux or 30GB for Windows and the volume created is not tagged.
I like to provision a larger volume for an O/S drive so below is a function I use to specify the size of the volume to be used for the EC2 O/S drive and also tag the volume.
Here’s the full function if you just want to see how it’s done (don’t forget to update the params or specify them when running the function) and I’ll go through it below.
The example is using PowerShell core 6.1.2 with the AWS PowerShell core module installed (it should also work with the PowerShell desktop edition AWS PowerShell module with a slight modification of the module that is imported).
Code below is saved as a script module called EC2CustomVolSiz.psm1.
# Script Module
# Requires -Modules AWSPowerShell.NetCore
# Create a new EC2 Instance that has a volume size that can be specified

function New-MDEC2Instance {
    [CmdletBinding()]
    [OutputType('PSCustomObject')]
    param (
        # Parameter help description
        [Parameter(Mandatory = $false)]
        [String]
        $ImageId = 'ami-09226bf1895277020',
        # Parameter help description
        [Parameter(Mandatory = $false)]
        [String]
        $KeyName = 'My.Key',
        # Parameter help description
        [Parameter(Mandatory = $false)]
        [String]
        $SecurityGroupId = 'sg-9a60f5e5', # All local network SG
        # Parameter help description
        [Parameter(Mandatory = $false)]
        [String]
        $AvailabilityZone = 'eu-west-1a',
        # Parameter help description
        [Parameter(Mandatory = $false)]
        [String]
        $SubnetId = 'subnet-7167f77d',
        # Parameter help description
        [Parameter(Mandatory = $false)]
        [String]
        $InstanceType = 't2.micro',
        # Volume Size in GB of OS drive
        [Parameter(Mandatory = $false)]
        [string]
        $VolumeSize = '50',
        # Parameter help description
        [Parameter(Mandatory = $false)]
        [String]
        $InstanceName = 'DemoInstance'
    )

    begin {
        Import-Module -Name AWSPowerShell.NetCore -Force
        #Tag helper function
        Function New-MDEC2Tag ($Key, $Value) {
            $tag = New-Object -TypeName Amazon.EC2.Model.Tag
            $tag.Key = $key
            $tag.Value = $value

            return $tag
        }
    }

    process {

        # Set volume size and block mappings of OS drive
        $blockDeviceMapping = New-Object -TypeName Amazon.EC2.Model.BlockDeviceMapping
        $ebsBlockDevice = New-Object -TypeName Amazon.EC2.Model.EbsBlockDevice
        $blockDeviceMapping.DeviceName = '/dev/sda1'
        $ebsBlockDevice.VolumeSize = $VolumeSize
        $ebsBlockDevice.VolumeType = 'standard'
        $blockDeviceMapping.Ebs = $ebsBlockDevice

        $params = @{
            'ImageId'          = $ImageId
            'KeyName'          = $KeyName
            'SecurityGroupId'  = $SecurityGroupId
            'AvailabilityZone' = $AvailabilityZone
            'SubnetId'         = $SubnetId
            'InstanceType'     = $InstanceType
            'BlockDeviceMapping' = $blockDeviceMapping
        }

        $ec2Instance = New-EC2Instance @params

        # Create the tags: EC2 Instance
        $InstanceNameTag = New-MDEC2Tag -key 'Name' -value $InstanceName
        # OS Volume
        $OSVolName = New-MDEC2Tag -key 'Name' -value "$InstanceName-os-volume"
        $OSVolDesc = New-MDEC2Tag -key 'Description' -value "$InstanceName OS Volume"

        # Tag the EC2 Instance
        New-EC2Tag -Resource $ec2Instance.Instances.InstanceId -Tag $InstanceNameTag
        # Tag the OS volume
        $osVolume = Get-EC2Volume -Filter @{ Name='attachment.instance-id' ; Values="$($ec2Instance.Instances.InstanceId)"}
        New-EC2Tag -Resource $osVolume.VolumeId -Tag $OSVolName
        New-EC2Tag -Resource $osVolume.VolumeId -Tag $OSVolDesc

        # Output a custom object with the Instance details
        [PSCustomObject]@{
            'Name' = $InstanceName
            'PrivateIP' = $ec2Instance.Instances.PrivateIpAddress
            'InstanceId' = $ec2Instance.Instances.InstanceId
        }
    }

    end {
    }
}
The following code creates an EC2 instance called MyInstance with a Volume Size of 75GB using the default param values in the script.
# Import the script module then run
Import-Module .\EC2CustomVolSize.psm1

New-MDEC2Instance -InstanceName 'MyInstance' -VolumeSize '75'
The parameter block contains basic AWS related parameters with default values relating to my account that can be overridden as required.
EC2 Tag helper function
A helper function is declared in the begin block to create the tags for the EC2 instance and the volumes.
        Function New-MDEC2Tag ($Key, $Value) {
            $tag = New-Object -TypeName Amazon.EC2.Model.Tag
            $tag.Key = $key
            $tag.Value = $value

            return $tag
        }
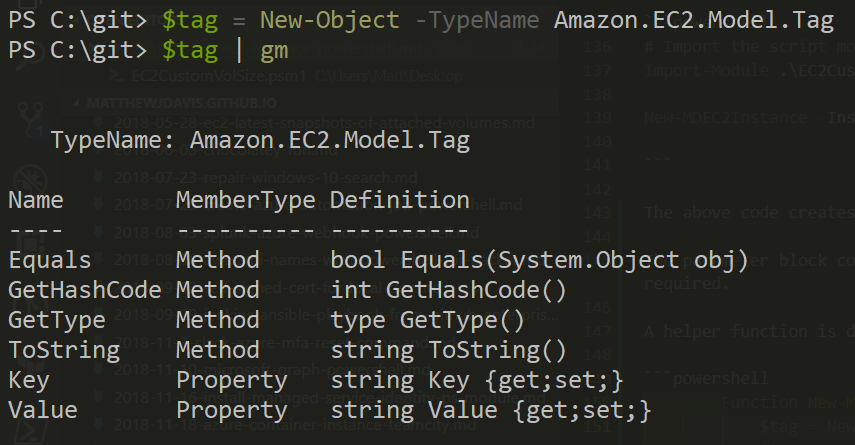
The type Amazon.EC2.Model.Tag has two properties, Key and value that are used to tag EC2 resources, this function is used to create the tags that are then applied to the EC2 instance and the volume.

Now we get to the part of the code that creates and maps a volume to the instance.
# Set volume size and block mappings of OS drive
$blockDeviceMapping = New-Object -TypeName Amazon.EC2.Model.BlockDeviceMapping
$ebsBlockDevice = New-Object -TypeName Amazon.EC2.Model.EbsBlockDevice
$blockDeviceMapping.DeviceName = '/dev/sda1'
$ebsBlockDevice.VolumeSize = $VolumeSize
$ebsBlockDevice.VolumeType = 'standard'
$blockDeviceMapping.Ebs = $ebsBlockDevice
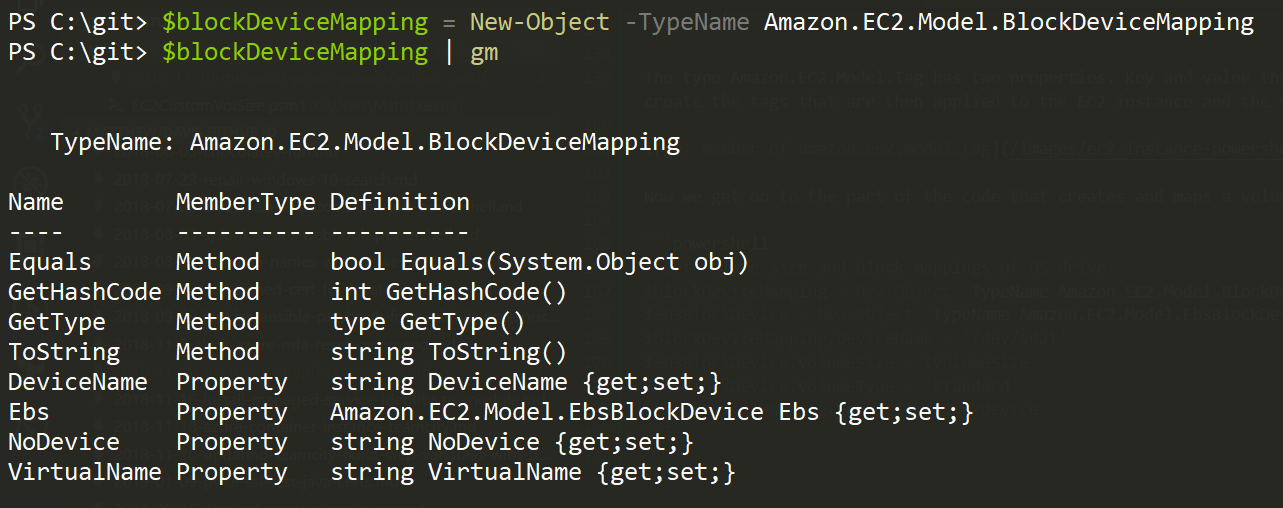
The type Amazon.EC2.Model.BlockDeviceMapping has four properties that can be set, the ones we are interested in are the ‘DeviceName’ (which is /dev/sda1 for the root volume) and EBS which is the EBS block type shown further down.

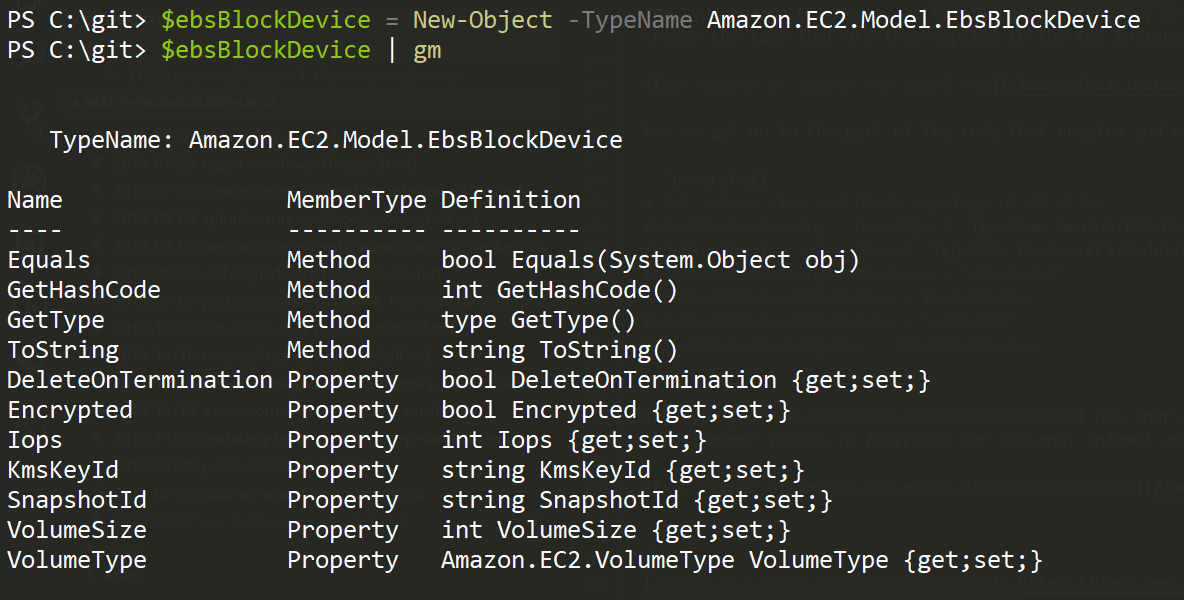
The type Amazon.EC2.Model.EbsBlockDevice has seven properties that can be set including the volume size which we pass a parameter value to and the type of volume. AS I am using this script to create test instances, the volume type is set to standard but it could be paramaterised with a validate set of options of gp2, io1, st1, sc2 or standard. Other properties to check out for production are the encryption, Iops and delete on termination.

After creating the EbsBlockDevice type, we can set the Block Device Mapping EBS property with it, so now we have our OS volume configured and ready to be applied.
Now the OS volume is ready, the parameters are splatted to make it easier to read and the instance is created with the output saved to a variable.
        $params = @{
            'ImageId'          = $ImageId
            'KeyName'          = $KeyName
            'SecurityGroupId'  = $SecurityGroupId
            'AvailabilityZone' = $AvailabilityZone
            'SubnetId'         = $SubnetId
            'InstanceType'     = $InstanceType
            'BlockDeviceMapping' = $blockDeviceMapping
        }

        $ec2Instance = New-EC2Instance @params
As the instance is intialising, we use the helper function to create the tags for the instance and OS volume and apply them using the instanceId property from the variable that the result of the New-EC2Instance was assigned to.
# Create the tags: EC2 Instance
$InstanceNameTag = New-MDEC2Tag -key 'Name' -value $InstanceName
# OS Volume
$OSVolName = New-MDEC2Tag -key 'Name' -value "$InstanceName-os-volume"
$OSVolDesc = New-MDEC2Tag -key 'Description' -value "$InstanceName OS Volume"

# Tag the EC2 Instance
New-EC2Tag -Resource $ec2Instance.Instances.InstanceId -Tag $InstanceNameTag
# Tag the OS volume
$osVolume = Get-EC2Volume -Filter @{ Name='attachment.instance-id' ; Values="$($ec2Instance.Instances.InstanceId)"}
New-EC2Tag -Resource $osVolume.VolumeId -Tag $OSVolName
New-EC2Tag -Resource $osVolume.VolumeId -Tag $OSVolDesc
The last part of the function outputs the values of the created instance as a pscustomobject.
# Output a custom object with the Instance details
[PSCustomObject]@{
    'Name' = $InstanceName
    'PrivateIP' = $ec2Instance.Instances.PrivateIpAddress
    'InstanceId' = $ec2Instance.Instances.InstanceId
}
Summary
Creating an EC2 instance with PowerShell is straightforward enough, however sometimes you need to customise the volume size and it is also important to tag your resources. The function outlined in this post shows how this can be all achieved and this function can be modified to be run from a build system to deploy EC2 instances into an AWS account for testing.