Deploy Storage to Azure via VSTS
July 2017
Overview
In this post, I’m going to show you how to deploy an Azure Storage Account to Azure using Microsoft’s Visual Studio Team Services (VSTS).
Using infrastructure as code and a build and release pipeline, this makes it easier to set up resources in different environments and even different Azure subscriptions / regions.
The code for the storage account is available in my GitHub account, it consists of two ARM templates:
- azuredeploy.json - the template containing details of the resource (storage account in this example)
- azuredeployparameters.json - this file is used to override the parameters in the template file to allow us to reuse it in different scenarios / projects
You’ll need:
- An active Azure Subscription
- A VSTS account These are free as long as you stay within the limits. Microsoft are very good at warning / disabling resources so you don’t spend any money but you should keep a close eye on costs if you have monthly credit to use. This example doesn’t store any data in the storage account so there will be no charges, if you do store data, you’ll get charge / have credit reduced.
The process is for Azure storage but can be used to deploy other Azure resources as long as you have the ARM templates.
The steps are:
- Build the templates so they are outputted as artifacts
- Use the artifacts from the build to release the resources to an Azure subscription.
Setup VSTS project
Login to VSTS
- Create a New Project
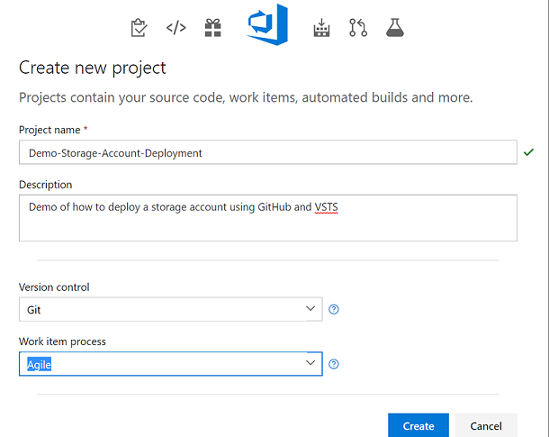
Note: I’m not going to be using the source control provided by VSTS because I’m using GitHub for this demo. VSTS offers free private repositories and integrates very nicely with the build tasks.
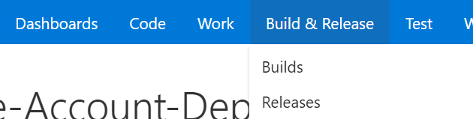
Create Build
- From the top menu select “Build & Release”
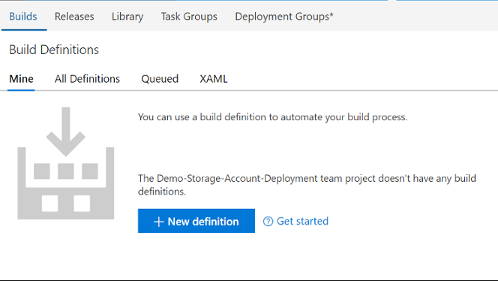
- click the + New definition
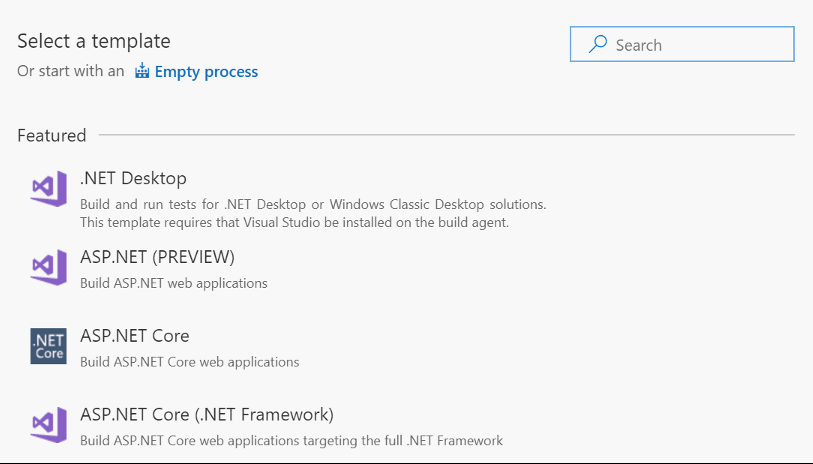
- select Empty process
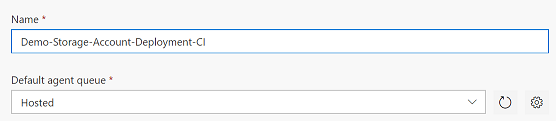
Click on the Process:
- Name: rename this build if you like
- Agent: Hosted
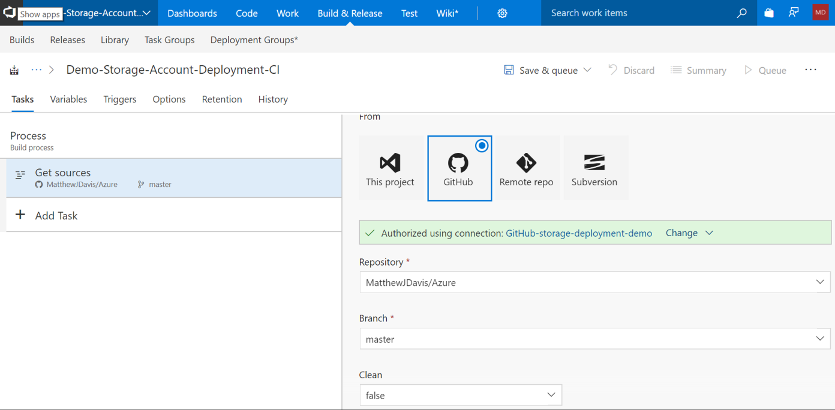
Now you select your source, this can be your VSTS project repo or a remote repo See the VSTS documentation for setting up a remote source. Here’s my settings connected to my GitHub repo
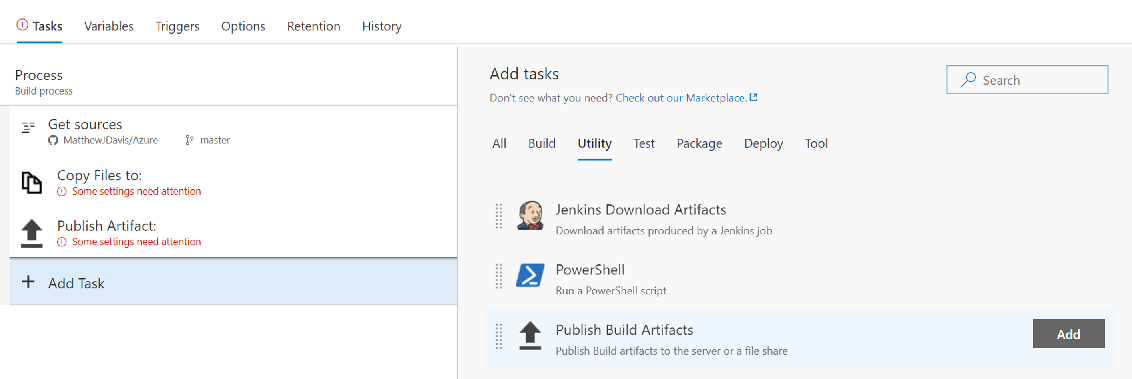
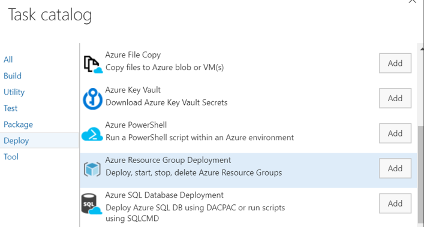
Click on add task Under the utilities section Add the following two tasks:
- Copy Files to:
- Publish Build Artifacts
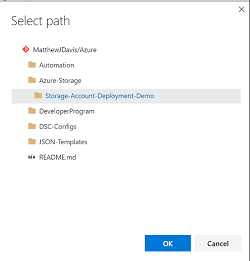
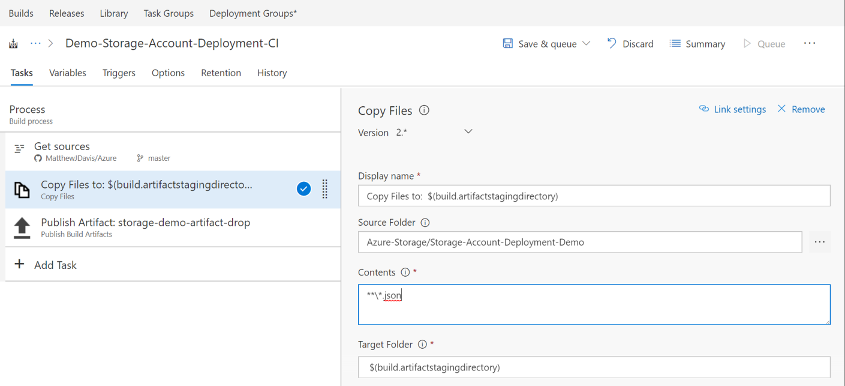
- Click the Copy Files task
- Source Folder: Select the ellipses and select the folder containing the template and parameters JSON files
-
Contents: **\*.json (we only want the JSON files) See file copy docs for more info.
-
Target Folder: $(build.artifactstagingdirectory) (this where the files will be copied before we upload them as an artifact to be used in the release)
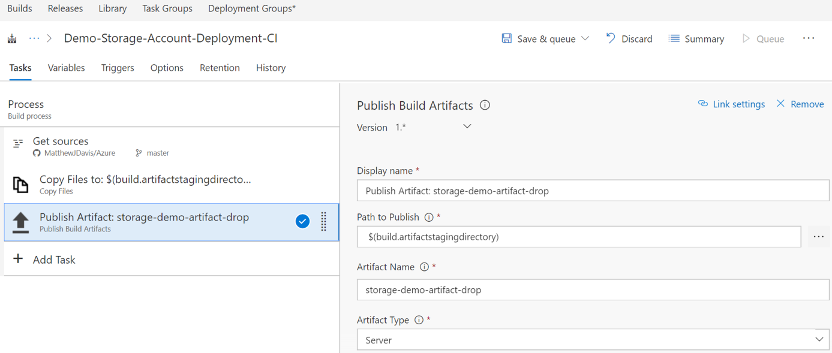
Click the Publish Artifact task
- Name: Rename if you like
- Path to publish: $(build.artifactstagingdirectory)
- Artifact Name: storage-demo-artifact-drop
- Artifact Type: Server
Build Time
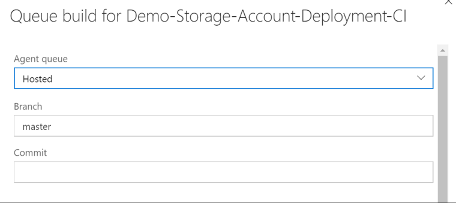
- Click Save and Queue
- Check the agent is “Hosted” and branch is “master”
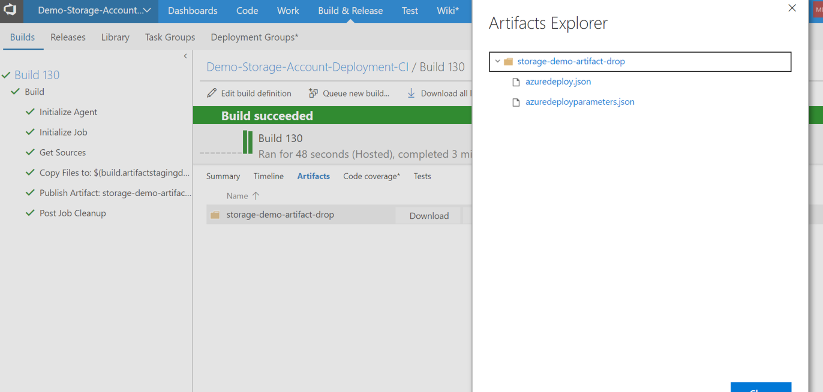
This will queue a new build and once it has completed you should have an artifact containing the two JSON files that can be used in the release phase.
Go back to the builds main page and click on the build. You should see a build number, click on that number and you will be taken into the details of the build.

- click on the Artifacts and see what the build produced
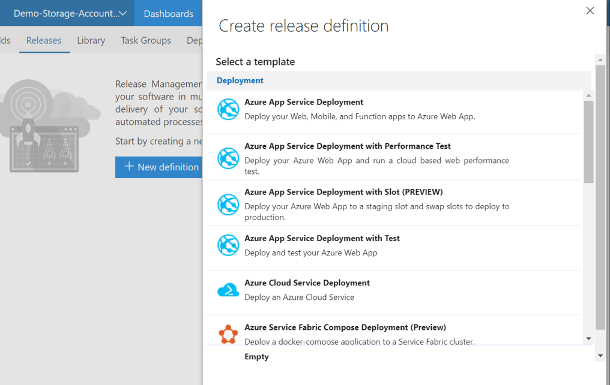
Release
- click the Releases tab
- click New Definition
Select Empty
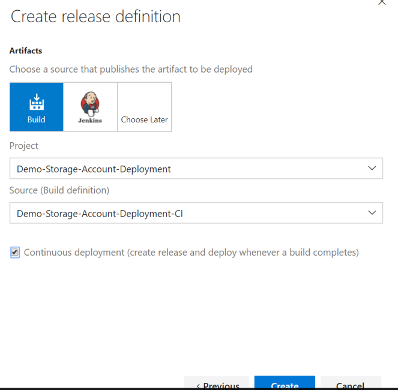
- make sure the build definition is the one you’ve just created.
- You can click the Continuous deployement if you like, then every time a successful build is created, the deployment will happen automatically (note: if you’re doing lots of little changes you may not want this and deploy manually otherwise you can use up your free monthly build minutes pretty quickly).
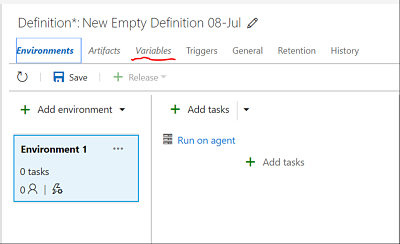
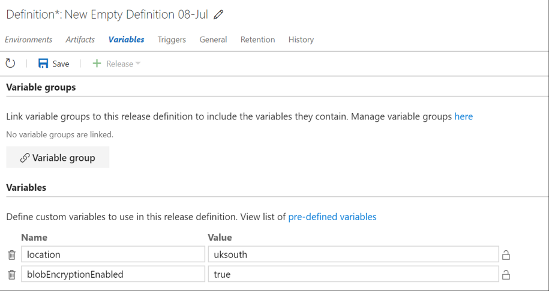
Release Varibales
- setup the Variable for the release, these will apply to all of the environments - click on Variables
Add the following variables (paying attention to the case):
- location: uksouth (or the Azure region nearest you)
- blobEncryptionEnabled: true
Click on Environment 1 and rename to Development or similar
- click Add Task
- select Azure Resource Group Deployment
- Azure Subscription: Select your Azure subscription from the drop down
- Action: Create or update resource group
- Resource Group: demo-storage-rg (or call it what you like or choose an existing resource group to deploy into)
- location: $(location) Here we are using the release variable that we set up earlier for the location
Template Artifacts
- Template: Linked artifact
- Template: click the elipses and select the azuredeploy.json from the artifacts we create from the build
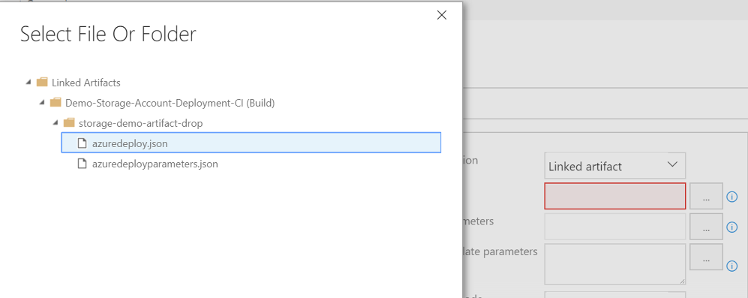
- Template Parameters: Repeat the previous process and select azuredeployparameters.json
- Override Template Parameters: -location $(location) -storageAccountName $(storageAccountName) -storageAccountType $(storageAccountType) -blobEncryptionEnabled $(blobEncryptionEnabled)
Here we specify the variables we are going to use to override the template parameters
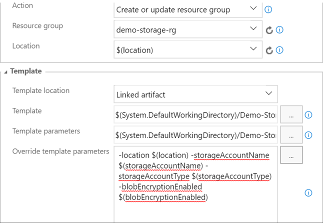
- Deployment mode: Incremental is fine
Environment Variables
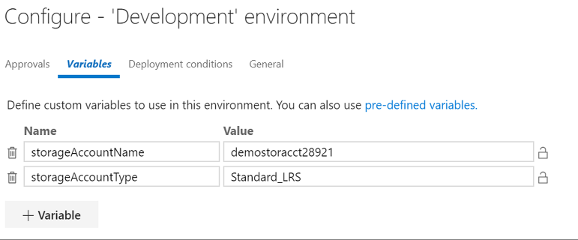
Now we set the variables for the individual environment.
- click the ellipses by the environment name and select Configure variables…
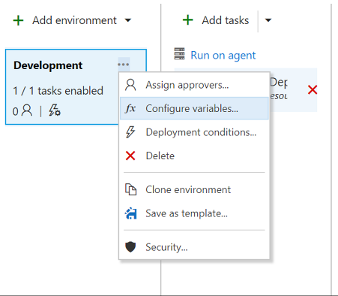
Enter the following:
- storageAccountName: storageacctname242 - this needs to be unique to Azure and has specific naming conventions
- storageAccountType: Standard_LRS
-
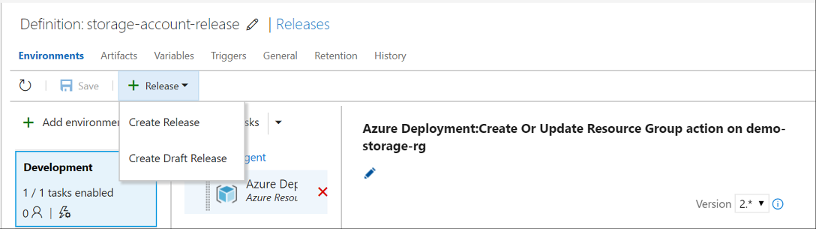
click the pencil icon to rename the release if you wish.
-
save the release
Click the Release button and select Create Release
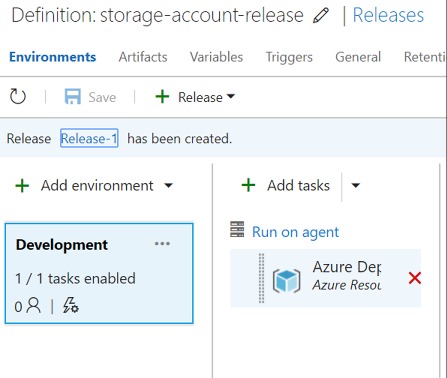
-
click create
-
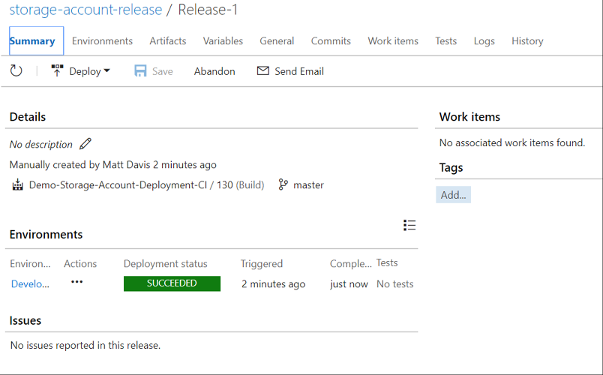
click on Release-1
You should now see the release deploying
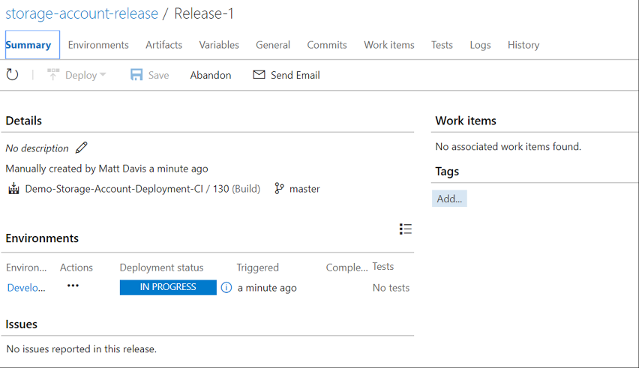
If you go to your Azure subscription, you should see the resource group created and shortly after the storage account and the release Deployment Status should show Success
In the Azure portal:
