Azure Active Directory Domain Services Part 1
July 2017
Overview
In the next few posts I’m going to go through the process of setting up Azure Active Directory Domain Services (AADDS). This service is a managed domain controller in Azure, removing the overhead of configuring and maintain a virtual machine (VM) to act as a domain controller for your Azure VMs. This post will focus on setting up the networking requirements to implement AADDS.
Note: this will incur costs, the AADDS has been costing around £3 a day of my Azure credit. Then there’s the cost of the management VM and the associated costs with it (public IP, storage etc).
Why
I’ve been using Desired State Configuration (DSC) to manage the configuration of VMs and one of the most commonly used task is joining a VM to a domain. I wanted to practice and evaluate different ways to automate the process including using Azure Automation and Chef for configuration management which I’ve been implementing recently. I could have configured a VM to be a domain controller like I’ve done in the past but thought this would be a great opportunity to see what AADDS offered functionality wise for a domain controller and to see if it would met my needs as a testing platform for configuration management in a domain environment.
Focus on automation - slight problems
I wanted to script all / as much of the process as possible so I can keep it in source control allowing reuse for other projects and for re-deploying if necessary but hit two slight problems with this:
- Deploying AADDS I looked through the Azure PowerShell commands to see if there are any for AADDS and as of July 2017, you can’t create this via PowerShell or with an ARM template so this step has to be done via the portal.
- Retrieving the DNS server values for AADDS Once AADDS is created you need the two DNS server values to set in your VNET(s) so the VMs will be able to resolve the domain, I couldn’t find a way to access the information programmatically. I couldn’t even get them from the Azure Resource Explorer.
Classic VNET required
As of July 2017 you have to deploy Azure Active Directory Domain Services into a classic VNET. This method uses the old Azure APIs (Azure Service Management) to interact with Azure and is no longer the recommended way to deploy resources unless the services is not supported by the Azure Resource Manager deployment method. See the deployment docs for more information.
Planning the VNETs
As always, it is wise to plan your VNETs and subnets before deployment. Using VNET peering it’s possible to use only one Classic VNET for AADDS and then peer that to ARM VNETs so we can deploy and manage ARM resources as normal.
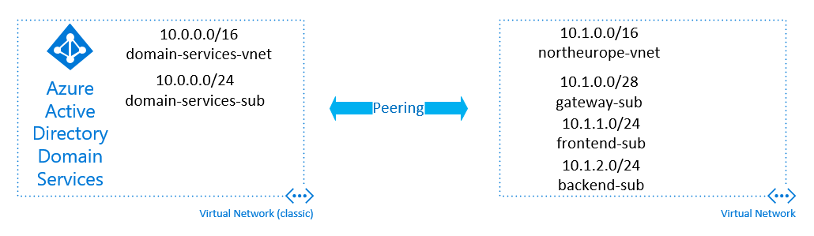
Classic VNET
- Address range: 10.0.0.0/16
- Subnet: 10.0.0.0/24
ARM VNET
- Address range: 10.1.0.0/16
- Subnet 1: 10.1.0.0/28 (Gateway subnet to peer with classic VNET)
- Subnet 2: 10.2.0.0/24
- Subnet 3: 10.3.0.0/24
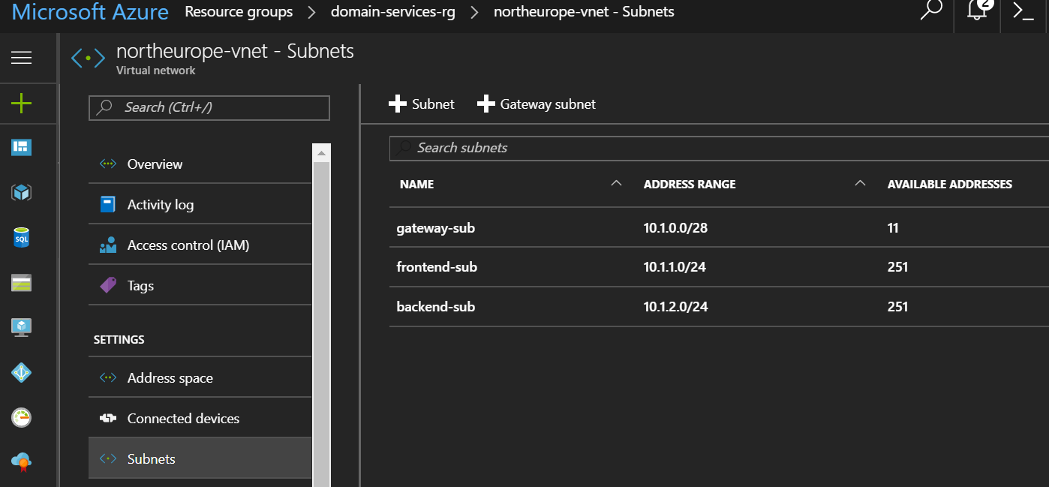
Creating the ARM VNET
Here we will setup the Resource Group to contain all the resources and while logged into AzureRM, create the VNET and subnets to.
- Login to AzureRM
Add-AzureRmAccount- Select correct AzureRM subscription (if you need to)
Select-AzureRmSubscription -SubscriptionName- Run the following (adjust the names / location / addresses as required)
Classic VNET deployment
Now it’s time to deploy the classic VNET, this means authenticating against the ASM API, using the Azure PowerShell module (not the AzureRM module).
- Login to Azure
Add-AzureAccount- Select correct Azure subscription (if you need to)
Select-AzureSubscription -SubscriptionNameTo deploy the classic VNET, you need to have the config in XML format like below:
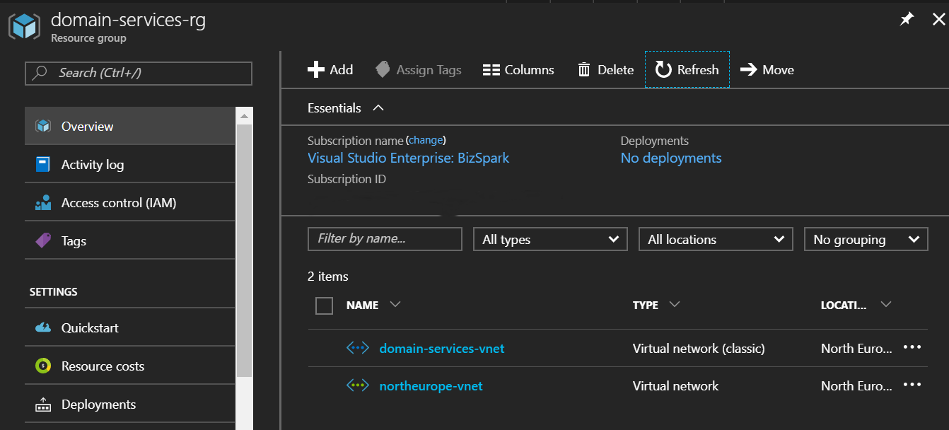
If you look at the VirtualNetworkSite element, you will see the resource group name with the VNET name, this will place it in the Resource group created. Save this file to the local computer and then run the following Azure PowerShell command with the full path to the file:
Set-AzureVNetConfig -ConfigurationPath C:\temp\classic-network-config.xmlYou should now see the classic VNET in the resource group with the ARM VNET in the portal.
Setting up VNET Peering
The last step of this part is to enable VNET peering between the classic and ARM VNETs. This will allow VMs provisioned in the ARM VNET to be able to communicate and join AADDS.
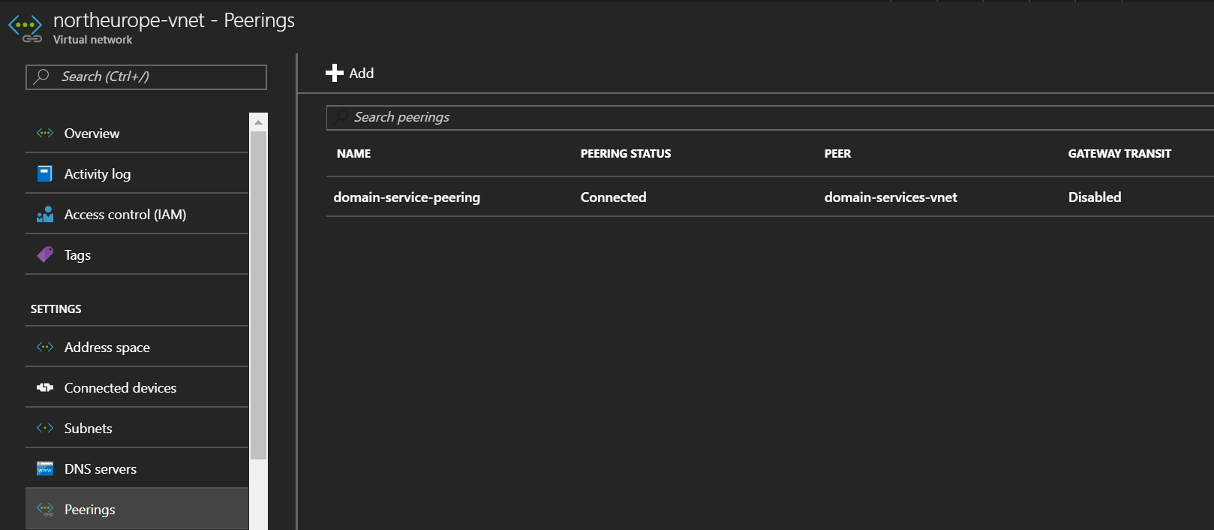
Below this code will create the peering between the two VNETs. Update the resource group name, classic VNET name and input your subscription name. These are all needed to create the classic VNET id so we can create the peering link.
After this has run successfully, you’ll be able to see the peering in the Azure Portal.
That’s the networking setup ready for the AADDS to be deployed. In the next post, I’ll show how this was set up and the DNS added to the VNET so VMs can find and join the domain