Use Terraform to deploy an Azure AD application
July 2021
Overview
This post will cover how to deploy an Azure AD application using Terraform and assign it permissions to the Microsoft Graph with User.Read scope. I’m using the latest version of Terraform (currently 1.0.3), latest version of the AzureAD provider (currently 1.0.6) and running on Ubuntu 18.04. Although this was carried out on a Ubuntu machine, it should be very similar for Windows or Mac.
The current AzureAD Terraform provider (1.0.6) uses the legacy Azure Active Directory Graph to interact with the API by default. Version 2 of the provider will be updated to use the Microsoft Graph API. For this post I’ve decided to use the Microsoft Graph which is currently in Beta support for this provider version but is not advised for production use.
This isn’t a beginners guide to Terraform or AzureAD, more of a post of how I have deployed to AzureAD with Terraform so a basic understanding of both would be beneficial.
Create application with permissions to deploy applications
The first step is we need to authenticate to be able to perform actions such as create, update and remove resources.
The easiest way to create a service principal is the Azure CLI. The Azure CLI can be installed locally or you can use it from the Azure cloud shell from the browser.
az login
az ad sp create-for-rbac --skip-assignment --name 'test-terraform-ad'
After running the above command, appID and password are displayed, keep a note of these somewhere secure such as a password manager.
Alternatively there is the guide on creating a service principal in the portal, however the Azure CLI is much quicker and easier.
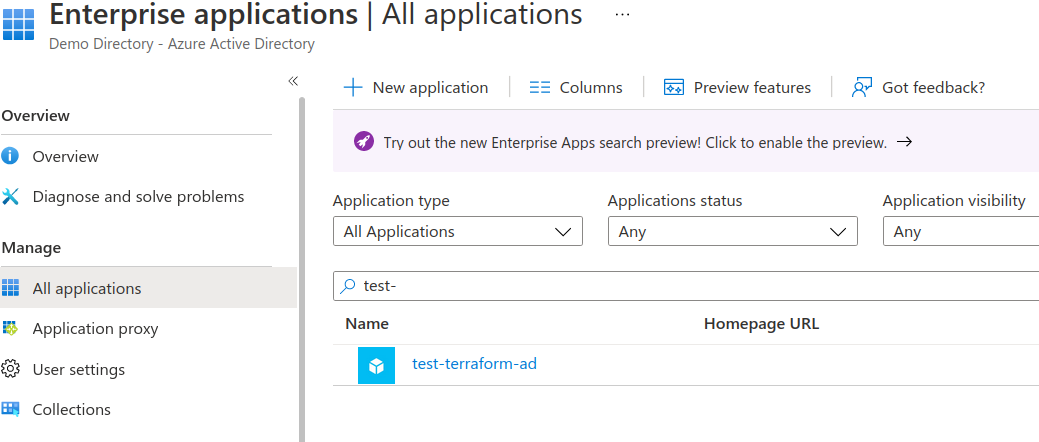
Now a service principal will be created in Azure AD. You can view this by going to the AzureAD portal, selecting the Enterprise applications blade, changing the Application type to All Applications then searching tor the test-terraform-ad service principal.
Note: Because we authenticate interactively with az login, Terraform would be authenticated in that session but I want to demonstrate how to do this with Service Principal credentials so they can be used in a CI/CD pipeline in the future.
Required permissions
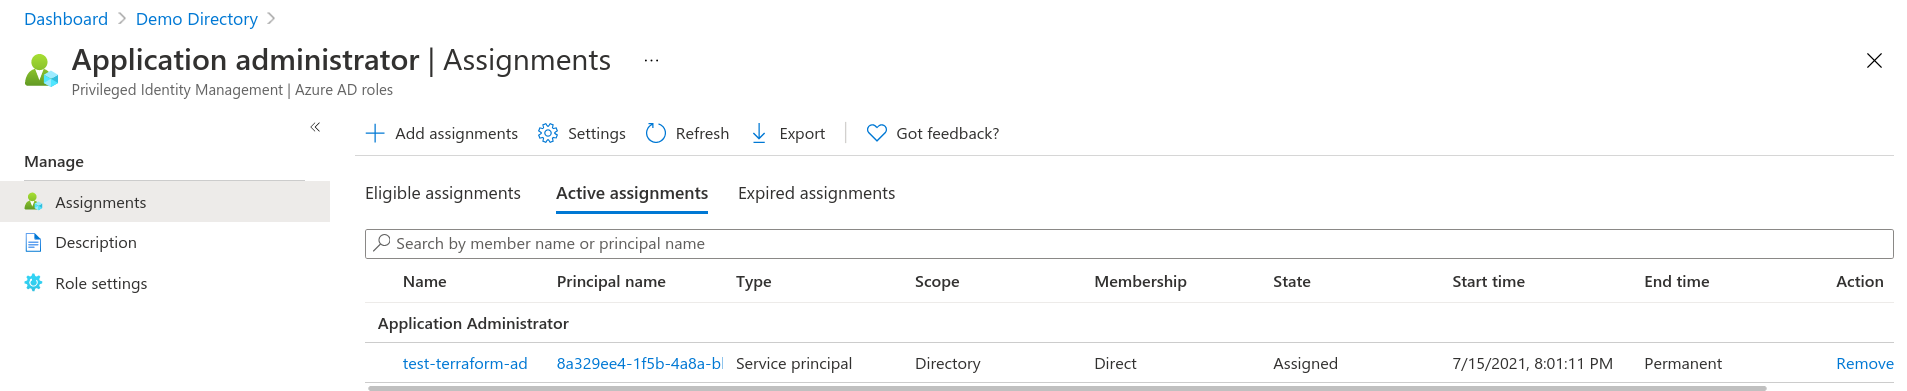
Assign the application administrator role to the service principal previously created test-terrafrom-ad.
You can use the Microsoft Graph API to set the role or via the portal as per screen shot below.
Go to Azure Active Directory then the Roles and administrators blade. Click on the Application administrator role, then the + Add assignments button and then Select Members link. Search for test-terrafrom-ad and confirm.
Set up Terraform
Create a new directory locally, and change directory to it.
mkdir azure-tf-demo
cd azure-tf-demo
touch main.tf
touch terraform.tfvars
Copy the contents of the following files.
Main file (main.tf).
Variable values file (terraform.tfvars).
Setting the credentials
Set the credentials of the Service Principal in authentication environment variables:
export ARM_SUBSCRIPTION_ID='abcde'
export ARM_TENANT_ID="abcde"
export ARM_CLIENT_ID="abcde"
 export ARM_CLIENT_SECRET="abcde"
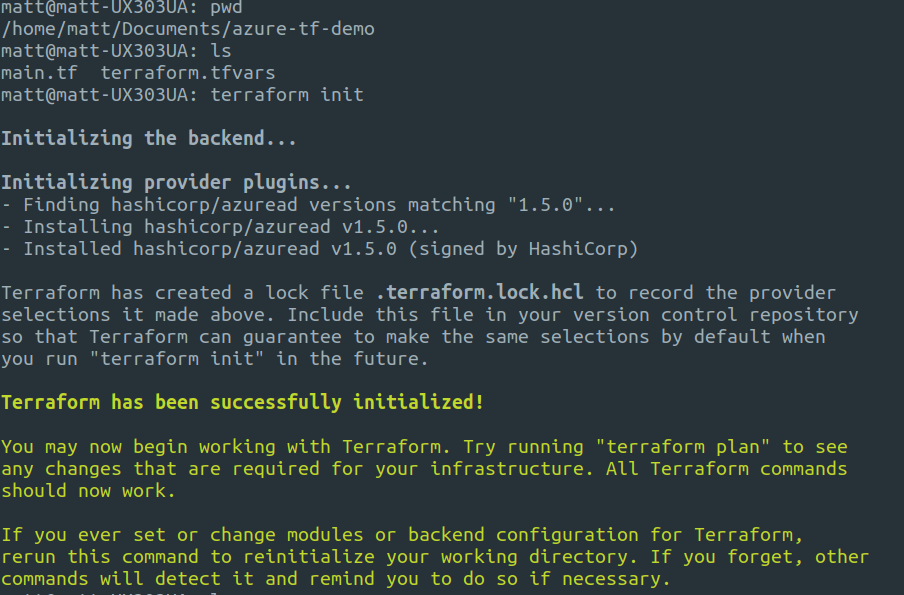
To initialize Terraform run the following:
terraform init
This will store the state locally on your machine in the same directory.
Validate everything is good by running:
terraform validate
The secret line is intentionally indented to keep it out of the bash history.
Plan the deployment
Now it’s time to run a plan to see what is going to be created. The plan is save to a file locally and the will be used to deploy the resources.
terraform plan -out deployment.tfplan
Deploying the application
If all looks good, it can be deployed using the output from the above plan command.
terraform apply -auto-approve deployment.tfplan
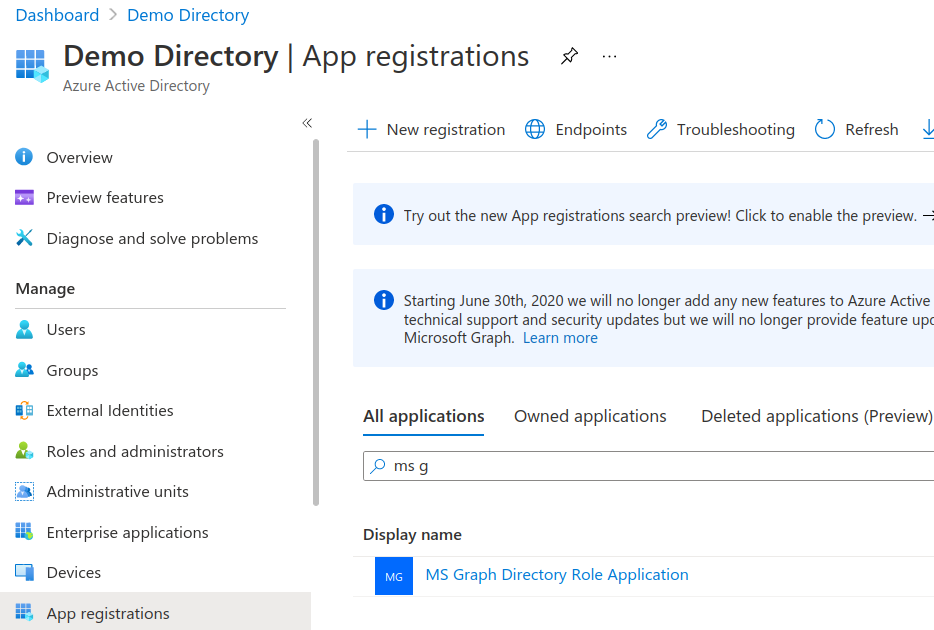
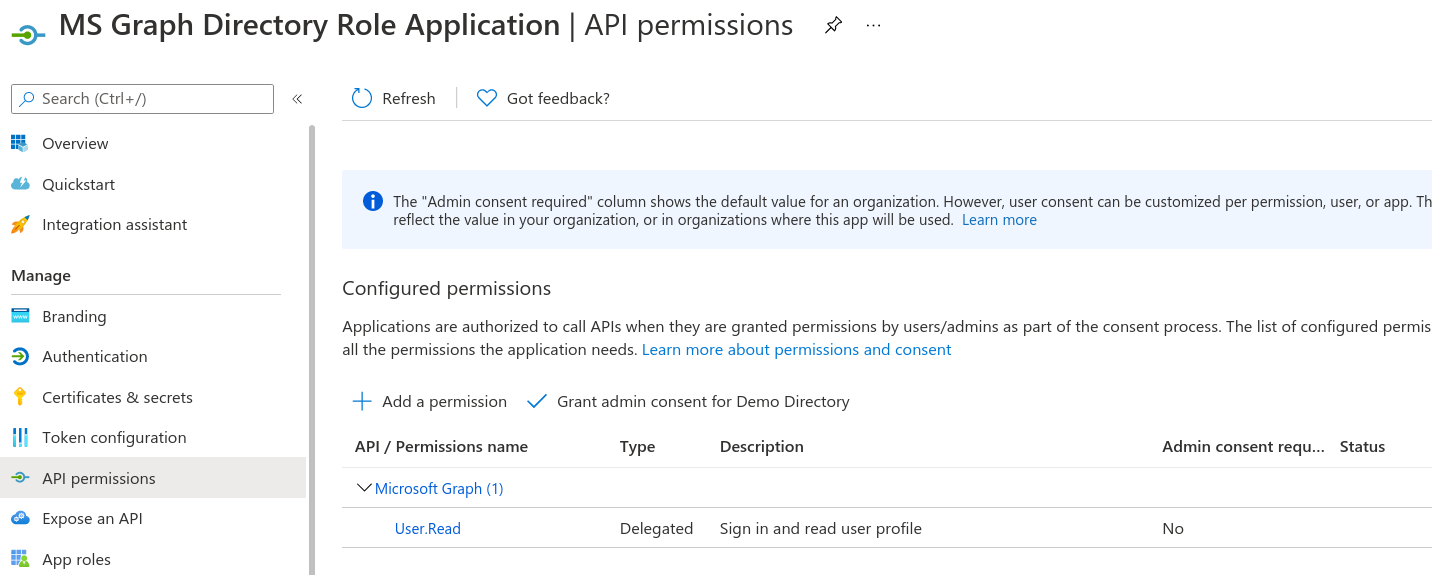
In the AzureAD portal under Azure Active Directory blade App registrations blade and All applications search for the created app.
Select the app then the API permissions blade to see the User.Read scope granted to the app.
The application password
Previously with the legacy Azure API you could specify the application secret however with the Microsoft Graph API, the secret is generated. To find the generated value, look in the terraform.tfstate file. Under the “type”: “azuread_service_principal_password” you’ll see “attributes” and then “value” which has the password. This is why it is very important to protect the Terraform state file (it can contain sensitive information), especially when working with a remote backend, it should be encrypted at rest and limited access applied to the backend.
Update the application
Now the deployment has been made, the plan is stale and needs updating.
terraform plan -out deployment.tfplan
Running an apply command again will result in nothing being changed.
Change the name of the value in the tfvariables.tf file to something else and run:
terraform plan -out deployment.tfplan
A change will be displayed.
Run the apply command to update the application.
terraform apply -auto-approve deployment.tfplan
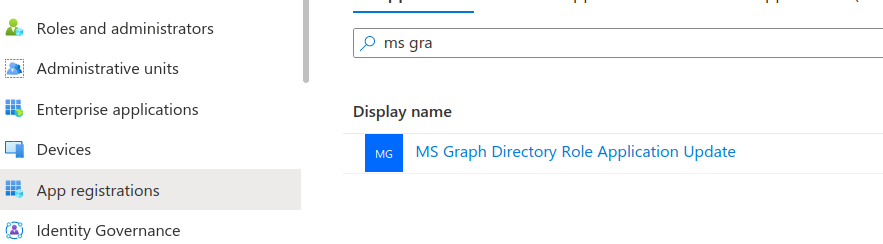
Refresh the Overview page and you’ll see the new Application name.
Destroy the application
Clean up the application and service principal using the destroy command.
terraform destroy
Because the auto-approve option is not specified, a prompt will ask to confirm.
The resources managed by Terraform will be deleted.
I’ve created another post on how to configure Azure blob storage to save the state file remotely so it can be used in a team environment so if you want to follow along with that, keep the service principal otherwise it can be removed by running the Azure CLI:
az ad sp delete --id id-of-sp-created-earlier
Now all the resources for this post will be removed.