Azure Active Directory Domain Services Part 3
July 2017
Overview
In part 1 we configured the networking and in part 2 set up Azure Active Directory Domain Services (AADDS), a managed domain controller for Microsoft Azure.
Microsoft take care of the infrastructure running the domain controller so you can concentrate on managing the domain. To do this, you’ll need a domain joined Virtual Machine (VM) with Active Directory and DNS management tools installed.
This post will concentrate on installing the management tools.
- Provision a Windows 2016 VM
- Install the following tools for domain management
- Remote Server Administration Tools
- AD PowerShell
- DNS Server Tools
The VM needs to be placed within one of the subnets created in the ARM VNET in a subnet that is not the gateway subnet. The backend subnet makes sense because in a production environment this may only be accessible via a jumpbox or private IP address via a VPN.
Provision the VM either through the portal, via PowerShell or you can deploy via the ARM templates I’ve created and are stored on Github:
Connect to and login to the VM
- Authenticate to AzureRM and select the correct subscription
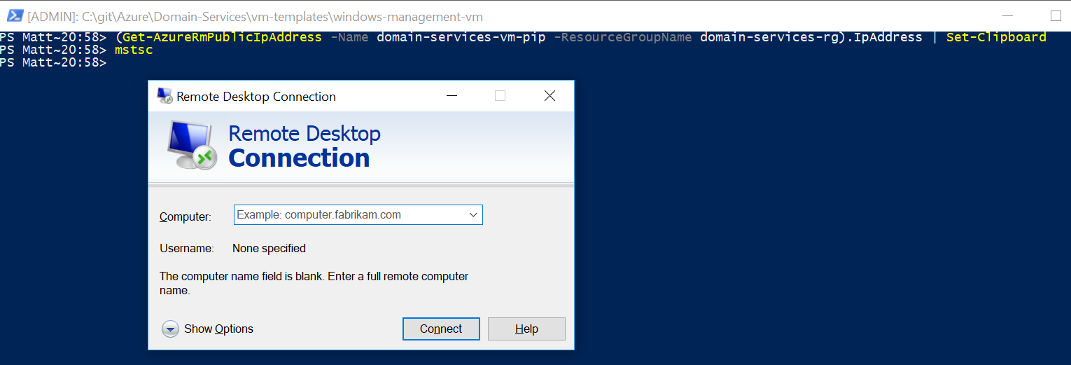
- Get the public IP address of the VM
(Get-AzureRmPublicIpAddress -Name domain-services-vm-pip -ResourceGroupName domain-services-rg).IpAddress | Set-ClipboardRemote desktop into the VM
Tip: type mstc into the PowerShell prompt to start remote desktop and then press ctrl + v to paste in the IP address (see screenshot below)
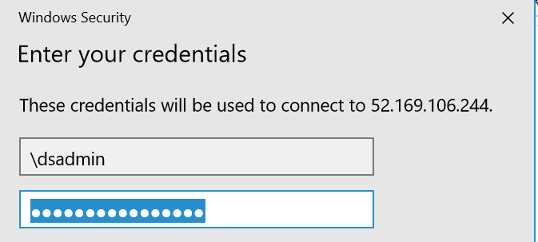
Enter the login details: \dsamin
Certificate Warning
You’ll get a certificate warning because the VM is presenting a certificate that our computer doesn’t trust. When you see these warnings, you should always pay attention and think about what is going on. Because we’ve just created this VM and have not installed any certs on it, our computer doesn’t know about it so rightly gives a warning, but because we’ve just created it and are going to the right IP address, click yes so we can connect to it.

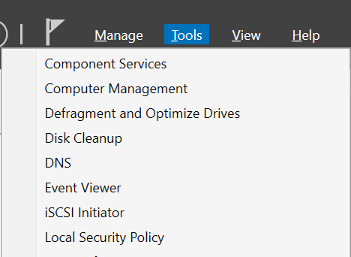
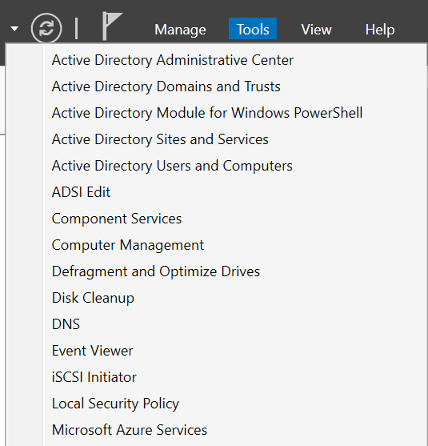
Check existing tools
Open Server Manager (it usually opens by default but if not, press the Windows menu key and type server manager). Click on the Tools menu at the top on the right and you will see that there are no AD or DNS tools
Note: If you want another cool way to test this using Pester Tests with PowerShell, scroll down and I’ll post a simple test that checks for the features, will fail because they are not installed and then after running the PowerShell to install the features, will pass to prove that the script does what it is supposed to do.
Install the features
Open up a PowerShell terminal as an Administrator We want to install the following: - Remote Server Administration Tools - AD PowerShell - DNS Server Tools
To do so we can create a variable with an array of two strings containing the name of each feature, then use a foreach loop to install each feature.
$features = 'RSAT-AD-Tools', 'RSAT-DNS-Server'
foreach($feature in $features) {
Install-WindowsFeature -Name $feature
}
What happens here is the Install-WindowsFeature Cmdlt is called for each item in the array, first time with the values RSAT-AD-Tools and the second time with the value RSAT-DNS-Server (AD PowerShell is part of the RSAT-AD-Tools feature).
This will take a couple of minutes or so to install.
The tools will be available from Server Manager under the tools directory.
In the next part, we’ll join the VM up to the domain and have a quick look at what we can manage.
Pester Tests
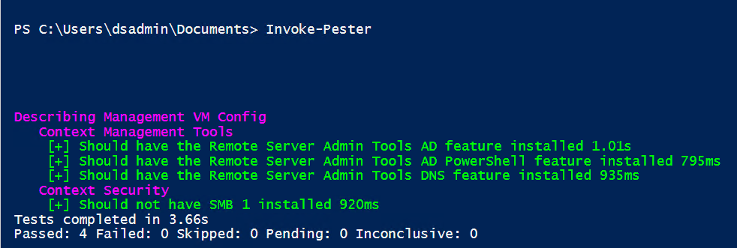
Pester tests are a great way to make sure your PowerShell scripts are behaving as they should. Below is a Pester test to make sure the features we say we wanted to install are installed (checking our script does what it should do). I’ve also put a test in to make sure smb-1 is not installed… after the vulnerabilities found that helps it propagate malware.
Save the script below and then from a PowerShell prompt in the same directory as the script run:
Invoke-PesterYou’ll see from the output the 1 test passed (smb-1 is hopefully not installed) and 3 failed.
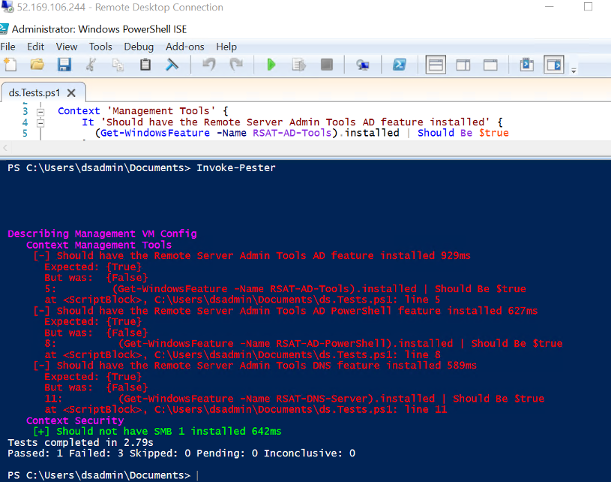
Once you have run the PowerShell script to install the features, run this again and you should see that all tests pass.