Connect to an Azure Linux vm with ssh and Windows Subsystem for Linux
September 2017
Overview
Windows 10 64bit version has the Windows Subsystem for Linux (WSL) installed allowing you to easily run Linux tools from within Windows 10 which is great for managing Linux VMs in Azure and AWS. When creating an EC2 instance in AWS, you specify which key pair to use so you can connect to your AWS EC2 instance via ssh. You create the initial key pair in the AWS Identity and Access Management (IAM) console and providing you keep the key safe and still have access to it, you’ll be able to easily connect to the EC2 instance.
Azure Linux VMs work slightly differently though the concept to connect is the same via ssh, you need to specify the public key to the vm and authenticate to it using the private key. The main difference is you must create the key pair on your computer and then paste the public key into the Azure VM.
This post will show you how to create an ssh key pair on Windows using the Windows Subsystem for Linux (it will also work if you’re just using an installation of Ubuntu Linux) and how to set up an Azure Linux VM and connect to it using the ssh key.
Installing WSL
Follow the msdn guide to Installing Windows Subsystem for Linux.
This will show you how to create the key pair and connect to the Azure VM using the Ubuntu distribution.
Creating the key pair
Important The private key should be treated and managed as a password. This key gives anyone in possession of it access to the system with the corresponding public key. It’s best to password protect the private key in case the key is accessed by someone who shouldn’t have it.
Check for existing keys
First of all, check that there are no existing keys on your system in the default location. The default location is in the top level directory of the user running the terminal session: ~/.ssh/ Run the following to check to see if there are any existing keys:
ls ~/.ssh/
Here is an output with existing keys created
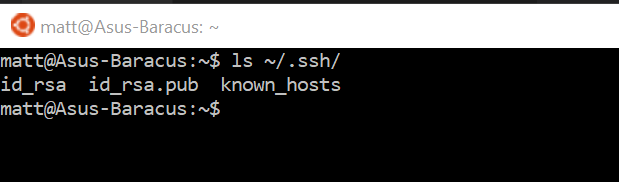
The files are:
- id_rsa = Private Key
- id_rsa.pub = Public Key
- known_hosts = machines that you trust
You can backup any existing keys in the ~/.ssh/ directory by running:
cd ~
mkdir ssh-backup
cp .ssh ssh-backup -r
To create the keys in the default location
ssh-keygen -t rsa -C "azure-vm-key"
- -t specifies the type of key to be generated
- -C allows you to provide a comment for the key (to help you identify it in the future)
To see the fingerprint and comment for your keys you can run:
ssh-keygen -l -f ~/user/home/.ssh/id_rsa
-l will show the fingerprint of the key along with the comment
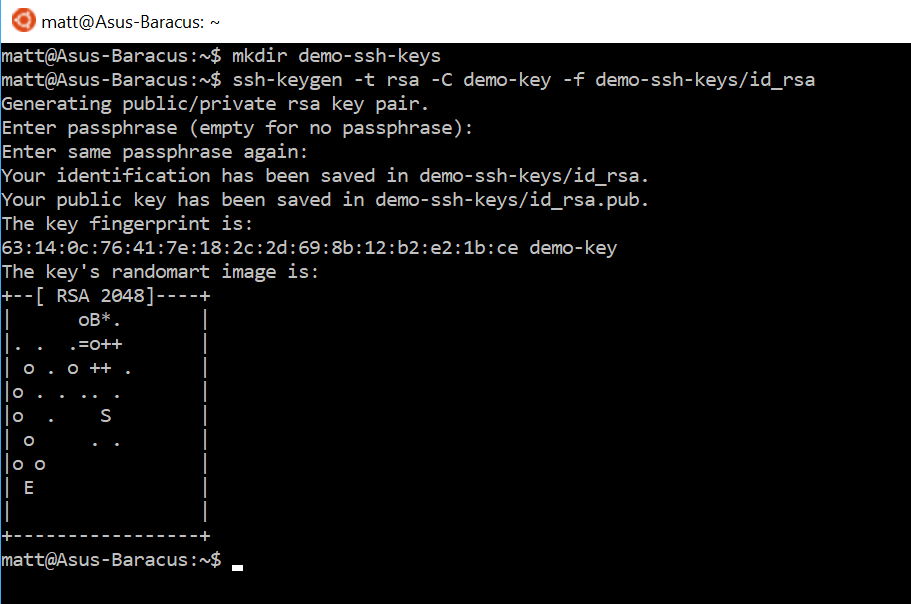
To create the keys in a specific location
Here I will create the keys in another location, the ~/demo-ssh-keys directory. Enter a password and confirm it when prompted
mkdir demo-ssh-keys
ssh-keygen -t rsa -C demo-key -f demo-ssh-keys/id_rsa
-f allows you to specify the name and location of the private key
Creating the Linux VM
Now that the keys are created, we will create a Ubuntu Linux VM in the Azure Portal
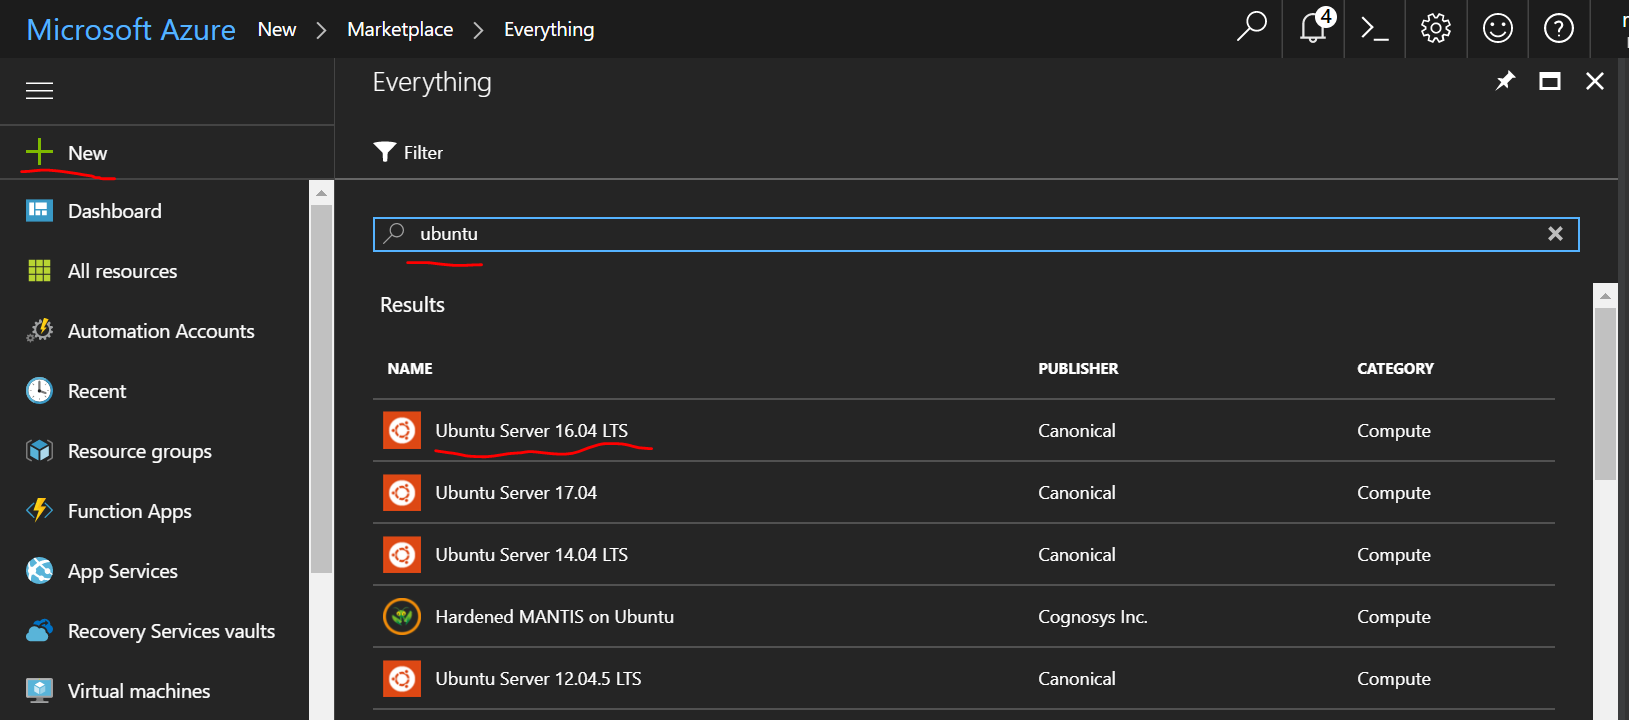
Login to the Azure Portal
- Click the + New
- Search for ubuntu
- Click an image (this demo uses Ubuntu Server 16.04 LTS)
- Make sure Resource Manager is selected as the deployment model
- Click Create
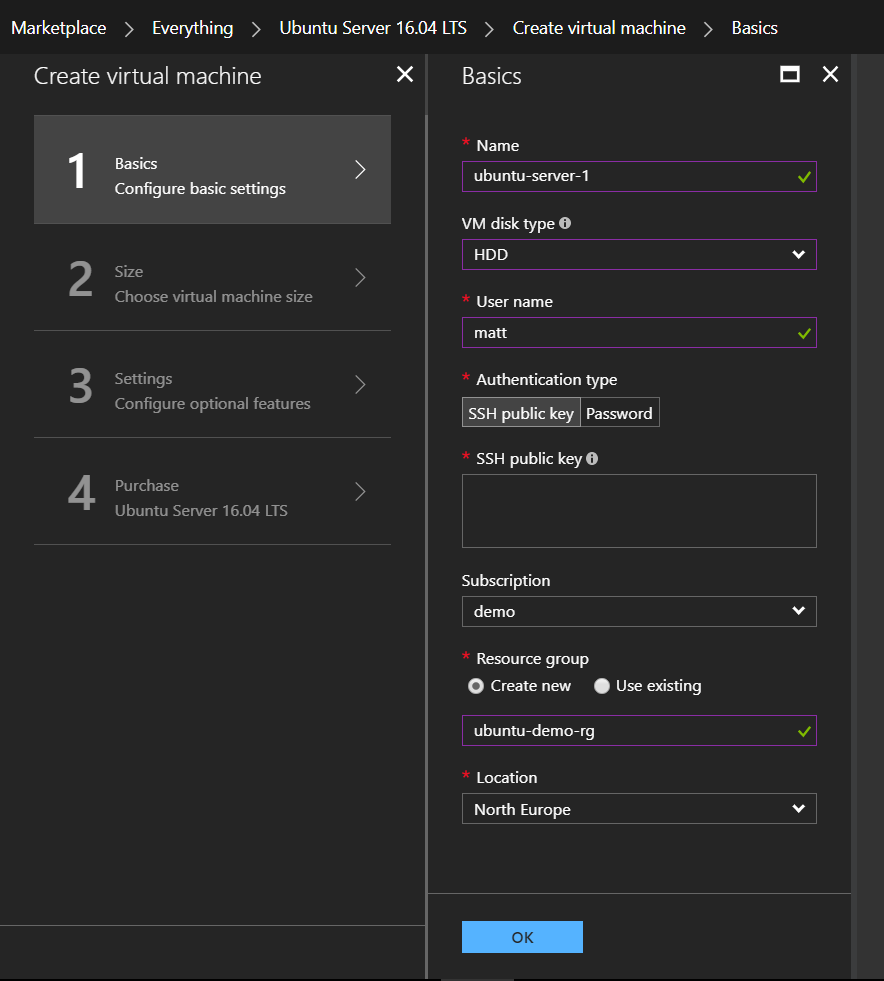
Basic Settings
- Name: ubuntu-server-1 or anything that makes sense
- VM Disk Type: HHD (I always change my dev / test vms to this to save credit)
- User name: anything you like, make a note for connecting later
- Authentication Type: leave default of SSH public key, this will be covered next
- Subscription: Select appropriate subscription if you have more than one (same one you )
- Enter a name for the resource group (ubuntu-demo-rg)
- Select the location for the resources to be created (North Europe)
ssh key
- focus (or open if you closed it) your bash terminal
- Get the public key (change the directory / file name in the code below if you created a custom one).
This will get the key from the default location:
cat ~/.ssh/id_rsa.pub
- Highlight all of the text from and including ssh-rsa to the end of the long string (see image below for selected text) by clicking the left mouse button
- Copy the text to the clipboard by clicking the right mouse button

- Go back to the browser with the Azure Portal open
- Paste the key into the SSH public key box
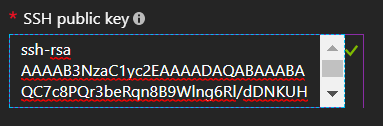
- Click OK
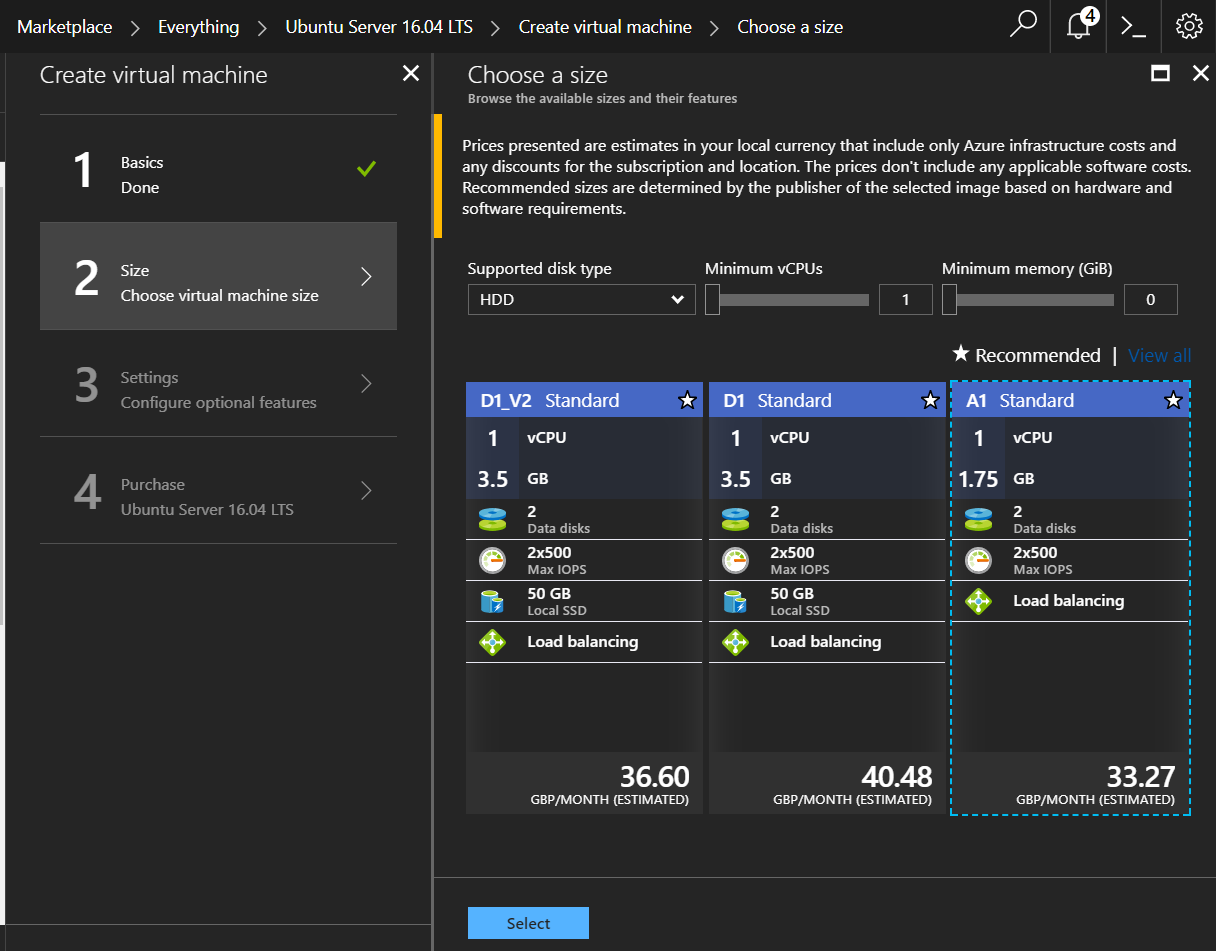
Choose VM size
- For this demo I will choose an A1 standard, select what size vm you feel is appropriate (you will be charge accordingly for compute time)
- Click Select
Configure Optional Settings
- I leave these as default for the demo, feel free to adjust as needed
- Click OK

Purchase
- Here you can review the settings
- Click Purchase
The deployment will now be started.
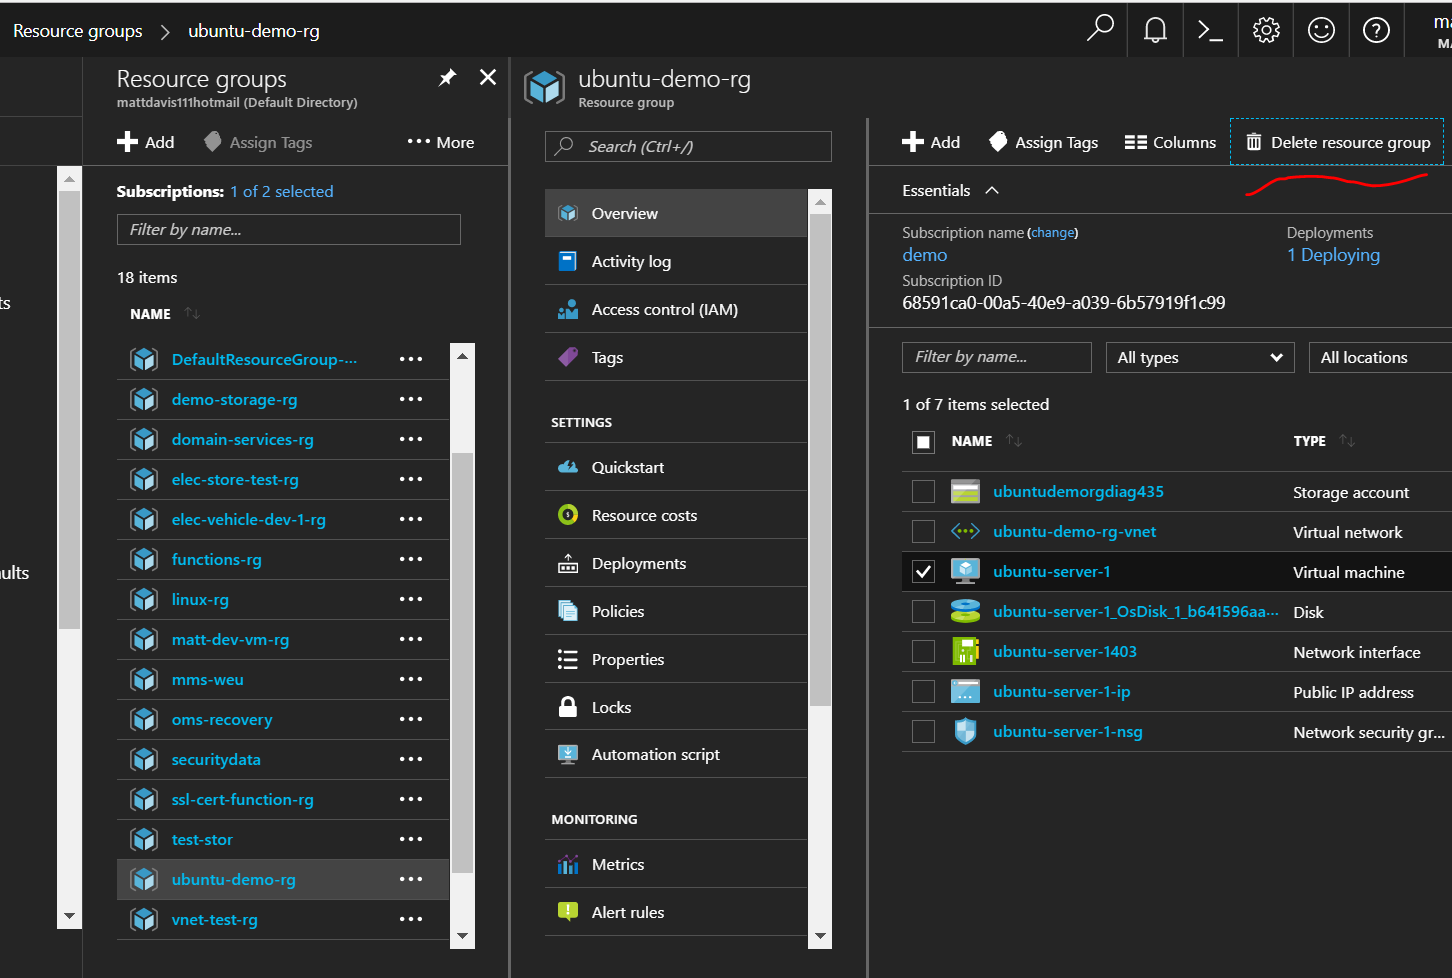
- On the left hand menu, click Resource Groups and click on the group created for the VM.
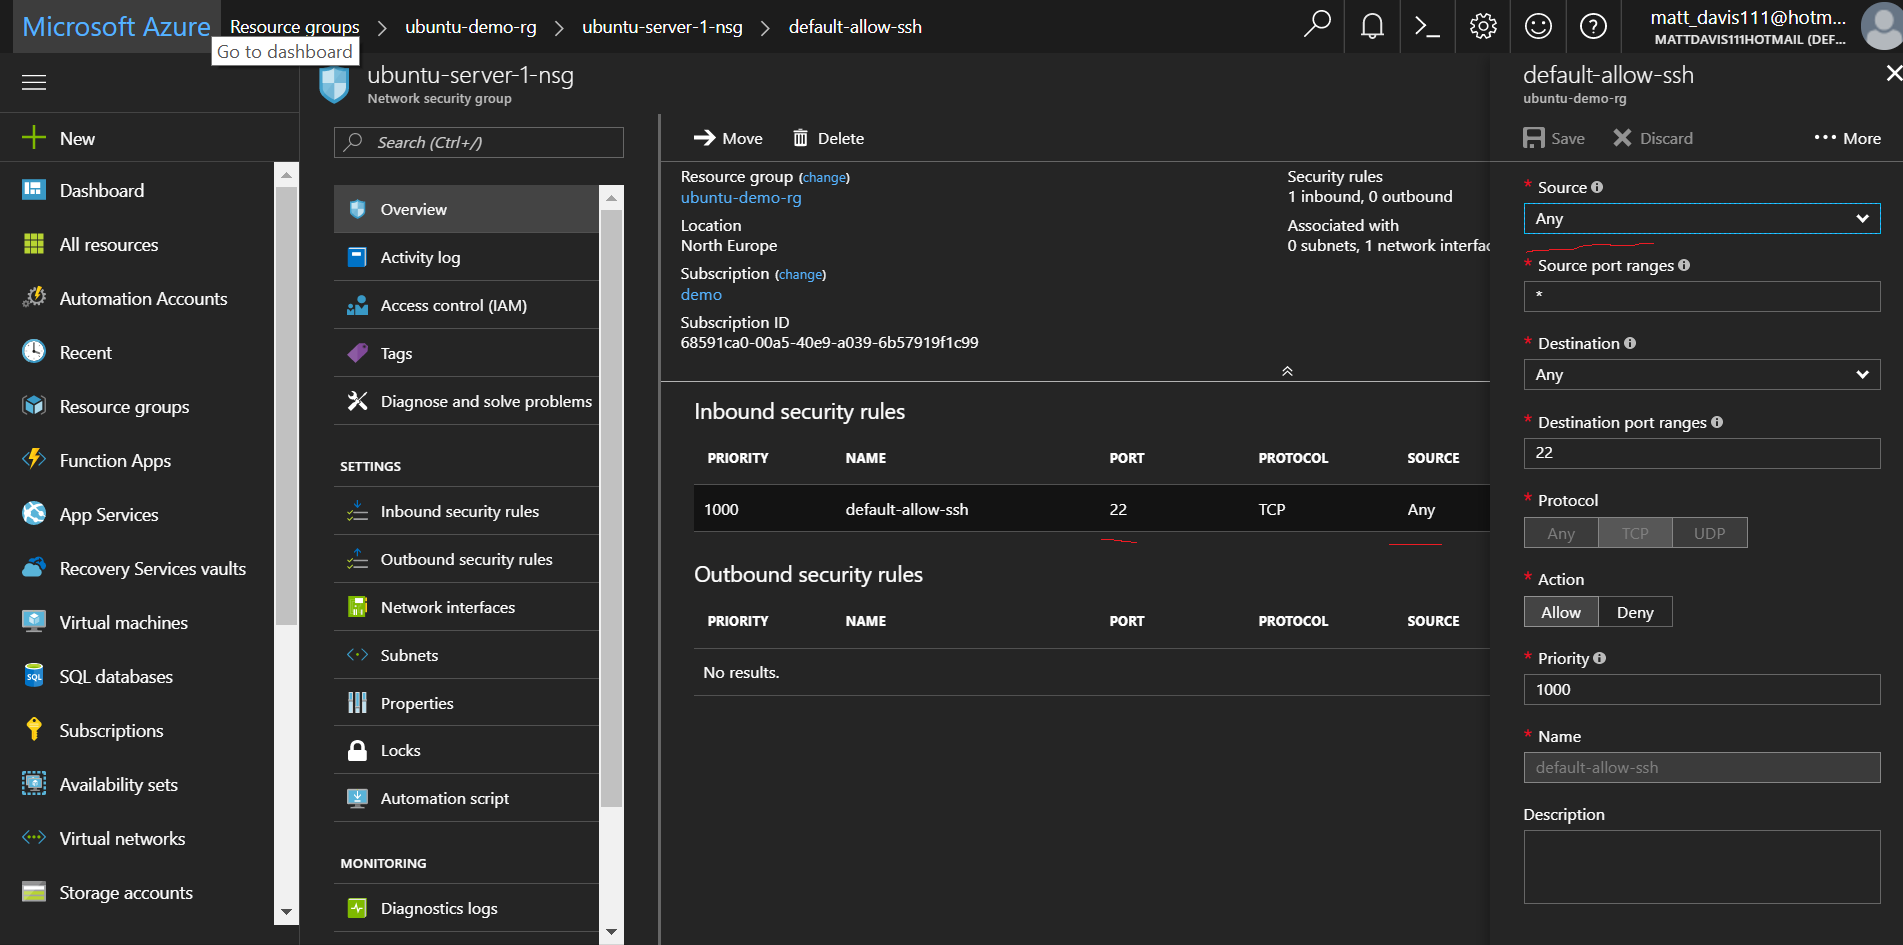
Network Security Group
- Click on the Network Security Group (will usually be named server-name-nsg if created through the portal)
Check that the Network Security Group allows ssh traffic (port 22) to reach the VM (for security you may wish to change this to your own IP address).
Connecting
- Click on the created VM
- Check status has changed from “creating” to Running
- Hover the mouse cursor over the IP address, to the right the clipboard icon will appear, click this to copy the address to the clipboard

Focus / open the bash terminal again
- Replace the username with the one you entered when creating the VM
- Replace the IP address with the one you copied from the portal to the clipboard
- Change the directory / filename if you are not using the default keys
ssh -i ~/.ssh/id_rsa [email protected]
- Enter yes (this will update the known_hosts file in the ~/.ssh/ directory with the new host)
- Enter the password for the private key
- You should now be connected to the server
- Type exit when you’re finished

Cleaning up
You can delete all the resources created if you want to save your credits by deleting the resource group that was created, this will delete all resources so take care when deleting resources and make sure you definitely want them gone.
- Click on the Resource Group to select it
- Click on the Delete Resource group icon
- Type in the name of the resource group to confirm
- Click Delete