Use PowerShell Core and the AZ module to manage Azure Active Directory Users and Groups
August 2019
Overview
I have been mainly using PowerShell Core for my daily work for a while now and have been using it a lot recently to interact with Azure and Azure Active Directory (AAD) so will go through some details of getting connected to the Azure tenant and some commands to manage users and groups in AAD.
After using Azure for a few years now, getting started with cloud services and the classic deployment model (the old Windows Azure Service Management API - now deprecated) and migrating over to the Azure Resource Manager API, I use PowerShell as much as possible to interact with it and automate work. I’ve moved away from the AzureRM PowerShell cmdlets to now use the cross platform AZ cmdlets (a lot less typing and not too bad to migrate old scripts over).
This guide has been written running PowerShell Core on Ubuntu linux, but as long as you are running PowerShell Core on any of the supported platforms, you’ll be able to follow along.
Install PowerShell core
Install PowerShell Core for your platform following the guides linked in the link. For ubuntu 18.04 I installed with the method of adding the Microsoft repository to apt-get. Ubuntu 18.04 install instructions.
Although this guide is showing it running on Ubuntu 18.04, the AZ cmdlets will be the same running PowerShell Core on Mac, Windows and even PowerShell Desktop edition running on Windows.
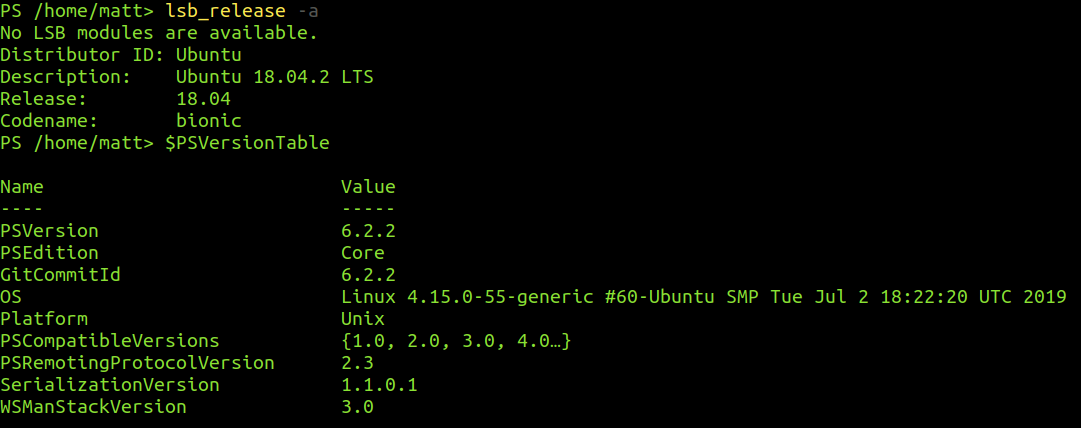
Details of the system used in this post:
Install AZ module
First we need to install the AZ module and this can be done using PowerShell. The Find-Module cmdlet searches the PowerShell gallery (providing you have not changed the default provider) and the Install-Module cmdlet installs it for the current user (you will need to sudo if on linux to install the module for all users).
Find-Module az

Install-Module -Name az -Scope CurrentUser

Now we can see the module is installed and as mentioned earlier, it can be used both on PowerShell Core and the desktop edition.
Get-Module -Name az -ListAvailable

Connecting
Note: You will need to sign in with a user who has permissions to manage users and groups in AAD (The User Administrator role would be good for least privilege access)
Now we have to sign in via a web browser for a token to be issued for your PowerShell session.
Connect-AzAccount

Once you have signed in with the correct credentials, you will see the message below and can close the browser tab.
Context
If you only manage one Azure tenant, then this will be the one you signed into set as your AzContext. You can select to manage another tenant by using the Select-AzContext cmdlet (you will have to re-authenticate if you have not done so or your session has expired).
You can view the current context details by running the following cmdlet:
Get-AzContext
Getting Users: Get-AzADUser
The Get-AzADUser command with no parameters specified will return all users, my test AAD only has a small number of users but you can use the -First parameter to limit the number of users returned.
(Get-AzADUser | Measure-Object).Count
Get-AzADUser -First 2

Searching
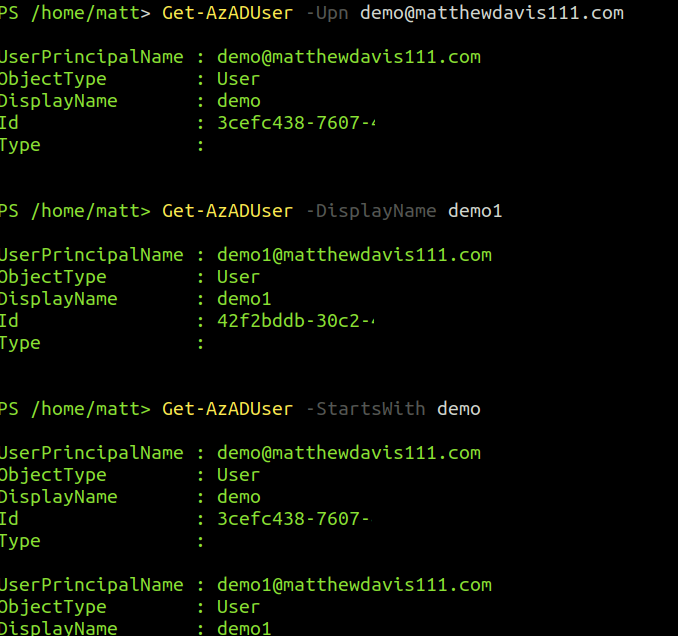
You can search by knowing the full display name, UserPrincipalName (UPN) or get all users that start with a certain letter or word.
Get-AzADUser -DisplayName demo1

Get-AzADUser -StartsWith demo
New User: New-AzADUser
Creating a new user is straight forward, I use the Get-Credential cmdlet to store a PSCredential object in the ‘creds’ variable then pass the username and password properties to the New-AzADUser cmdlet (I find this way easiest when running interactively. I would do it differently in a script as part of automation, this post covers ways on how to achieve this as well as good detail on credentials).
The MailNickname is required and cannot contain the ‘@’ sign (at time of this post you can not view this attribute with the az cmdlets). This is the mail alias and used if you are using Exchange online.
$creds = Get-Credential

New-AzADUser -DisplayName $creds.UserName -UserPrincipalName '[email protected]' -MailNickname $creds.UserName -Password $creds.Password -ForceChangePasswordNextLogin:$false

Update User: Update-AzADUser
We can update the display name and password of users using the Update-AzADUser. Only use this on users that were created in AAD, use on premises AD if you are syncing users up there.
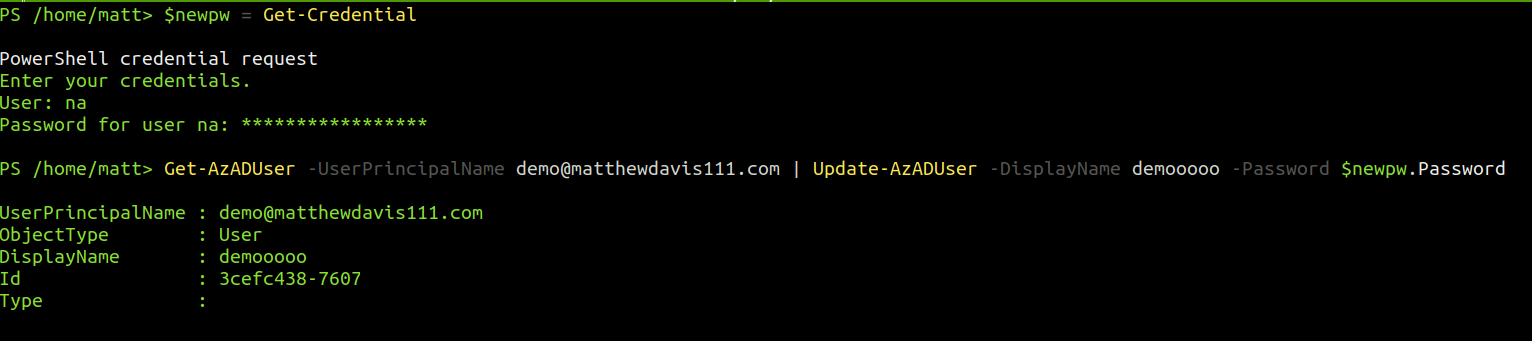
# save password in var
 $newpw = Get-Credential

# update displayname and password for user
 Get-AzADUser -UserPrincipalName demo@matthewdavis111.com | Update-AzADUser -DisplayName demooooo -Password $newpw.Password
Delete User: Remove-AzADUser
Does what it says on the tin, use with caution, or if you’re a monster that knows what they are doing and the consequences, use with the force parameter.
Get-AzADUser -DisplayName demo2 | Remove-AzADUser

New Group: New-AzADGroup
Similar to the New-AzADUser, the New-AzADGroup cmdlet is simple to use with a few properties to pass values to and again you need the MailNickName attribute.
New-AzADGroup -DisplayName a-demo-group -MailNickname a-demo-group -Description 'Group to hold demo users'

Adding and removing Group Members
Adding and removing users from groups works as you would expect, you can add multiple members in the MemberUserPrincipalName parameters as shown below. One thing to note is that the Add-AzADGroupMember cmdlet will error if the group already contains a specified user and at present, will not add any of the users.
# Add a single user to a group
Add-AzADGroupMember -TargetGroupDisplayName 'a-demo-group' -MemberUserPrincipalName '[email protected]'
Get-AzADGroupMember -GroupDisplayName 'a-demo-group'
# Remove the user
Remove-AzADGroupMember -GroupDisplayName 'a-demo-group' -MemberUserPrincipalName '[email protected]'
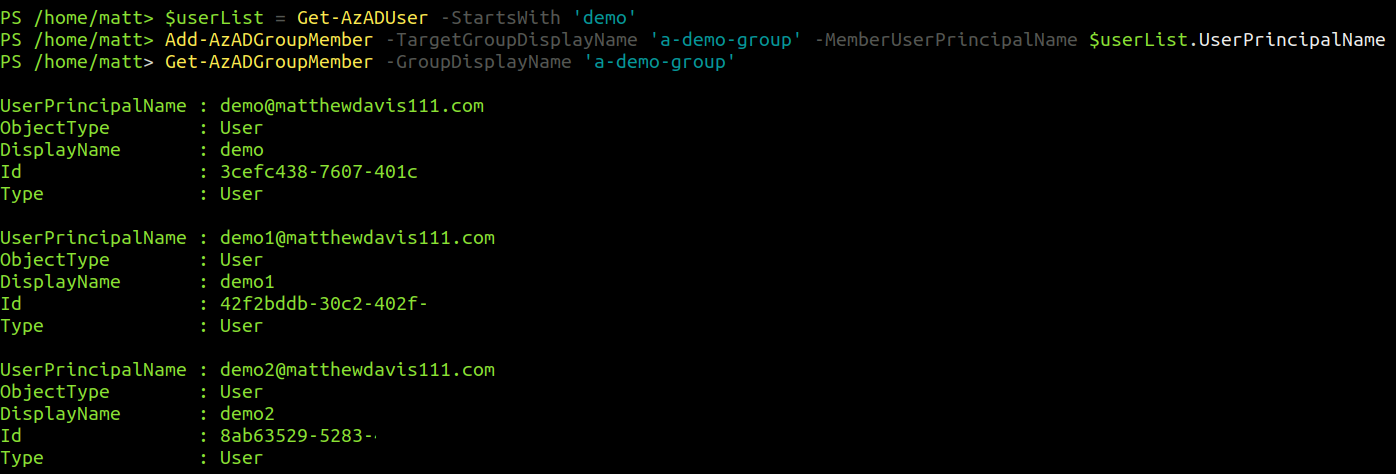
# Add multiple users to a group
$userList = Get-AzADUser -StartsWith 'demo'
Add-AzADGroupMember -TargetGroupDisplayName 'a-demo-group' -MemberUserPrincipalName $userList.UserPrincipalName
Get-AzADGroupMember -GroupDisplayName 'a-demo-group'
# Remove all users from a group
$RemoveUserList =  Get-AzADGroupMember -GroupDisplayName 'a-demo-group'
Remove-AzADGroupMember -GroupDisplayName 'a-demo-group' -MemberUserPrincipalName $RemoveUserList.UserPrincipalName
Get-AzADGroupMember -GroupDisplayName 'a-demo-group'

Delete the group: Remove-AzADGroup
Finally, we can tidy up by deleting the group (PassThru is a required parameter).
Remove-AzADGroup -DisplayName 'a-demo-group' -PassThru -Force
Summary
Using the AZ module in PowerShell core is a handy way to do some basic AAD user and group management and can easily enough be incorporated into automation. Despite being old and classed as ‘V1’ for interacting with AAD, the MS Online (MSOL) module gives access to lots more properties and I do need to use it from time to time, including in my previous post on how to check and alert if Azure Active Directory Sync has not been able to sync for a couple of hours.
The AZ module has become my daily driver and allows management via linux, mac or Windows. As I’m using my Ubuntu laptop more at home, it is great to be able to interact with Azure this way.