Authenticate and query the Microsoft Graph with PowerShell
November 2018
PowerShell and the Microsoft Graph
You can use the Microsoft Graph API to build apps for organizations and consumers that interact with the data of millions of users. With Microsoft Graph, you can connect to a wealth of resources, relationships, and intelligence, all through a single endpoint: https://graph.microsoft.com.
From Overview of Microsoft Graph
This post is an introduction on how to query the Microsoft Graph with PowerShell. It shows how to set up an Azure AD application and set permissions to allow you to retrieve user information, get an authorisation token and query the graph API. I’ve been interested in learning about the Microsoft graph for sometime put was put off by the lack of documentation on how to do it with PowerShell. Recently at work it has become apparent that we could make good use of some of the data that is exposed by the graph so thought I’d take a second look.
I found the Identity, Application, and Network Services on Microsoft Azure course on Pluralsight and watched the Microsoft Graph sections of the ‘Integrating app with Azure AD’ module which was really helpful in understanding how to authenticate to the graph to get an access token. I as able to test using Postman like in the video and then convert that to use PowerShell.
The below Cmdlets should be run in a single PowerShell session because the output of the commands are saved as variables and their properties are used in the script to call the Microsoft Graph. If the session is exited and the variables lost, the $ClientSecret and $ApplicationClientID variables will have to be added again.
Note: There is currently V1 and V2 of the graph and a comparison can be found on Microsoft Docs, I use V1 in this example.
Azure AD application
First we need to create an Azure AD application. This will be used by the client (PowerShell) to authenticate with and get an access token. The app is also used to set the relevant permissions to the directory. When the PowerShell authenticates successfully to the application endpoint it receives an access token that includes a list of claims. These claims are sent in the call to the graph and contain the authentication along with the authorisation for what resources can be accessed and what actions can be taken on them.
Here’s the PowerShell to create an application. The client secret will be used by PowerShell to get an access token that can then be used to query the graph.
# Login to AzureRM
Add-AzureRmAccount

# Variables for Cmdlets
# ClientSecret will be used to authenticate with the Azure AD application and should be stored securely.

$AppName = 'GraphDemo'
$ReplyUrl = 'http://localhost'
$IdUri = 'http://GraphDemo'
$ClientSecret = 'RandomStringHere'

$SecureStringPassword = ConvertTo-SecureString -String $ClientSecret -AsPlainText -Force
$app = New-AzureRmADApplication -DisplayName $AppName -ReplyUrls $ReplyUrl -Password $SecureStringPassword -IdentifierUris $IdUri

# Need to add User.ReadAll for application permissions in https://add.portal.azure.com
After the application is created, the permissions need to be granted. I could not find a way to do this via PowerShell so had to resort going back to the portal and doing it manually. You need to be an administrator to set application level permissions for the whole tenant or request that an administrator does it for you.
Login to the main Azure portal and navigate to Azure Active Directory or go directly to the Azure AD portal: https://aad.portal.azure.com/
- Click Azure Active Directory
- Click App registrations (preview)
- Click All Applications
- Search (if needed) and then click on the created applications
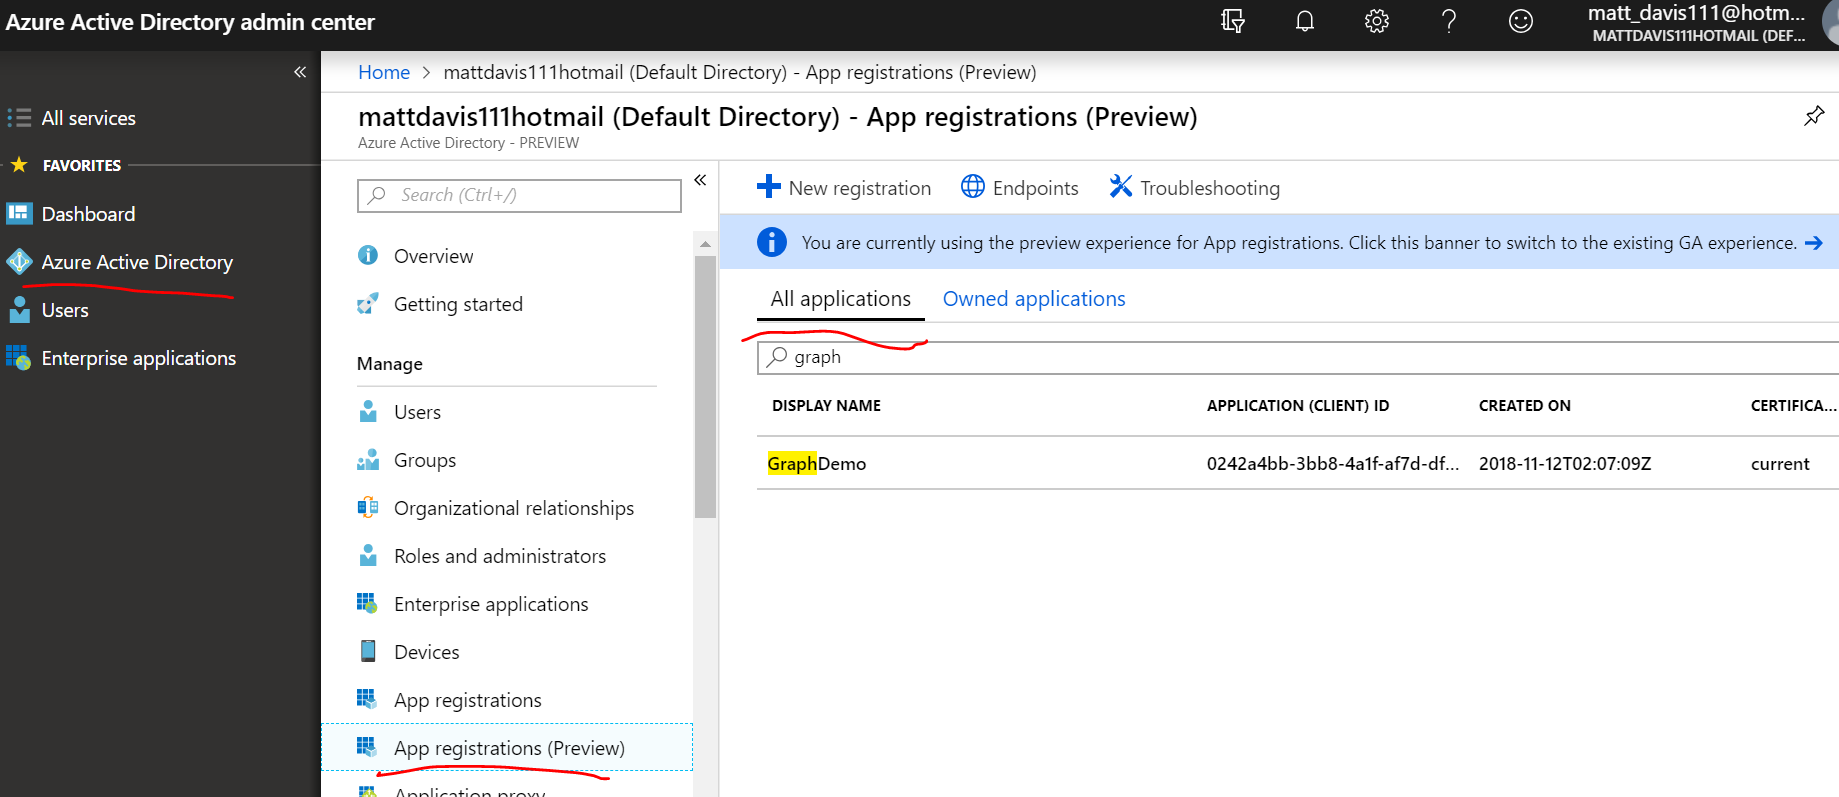
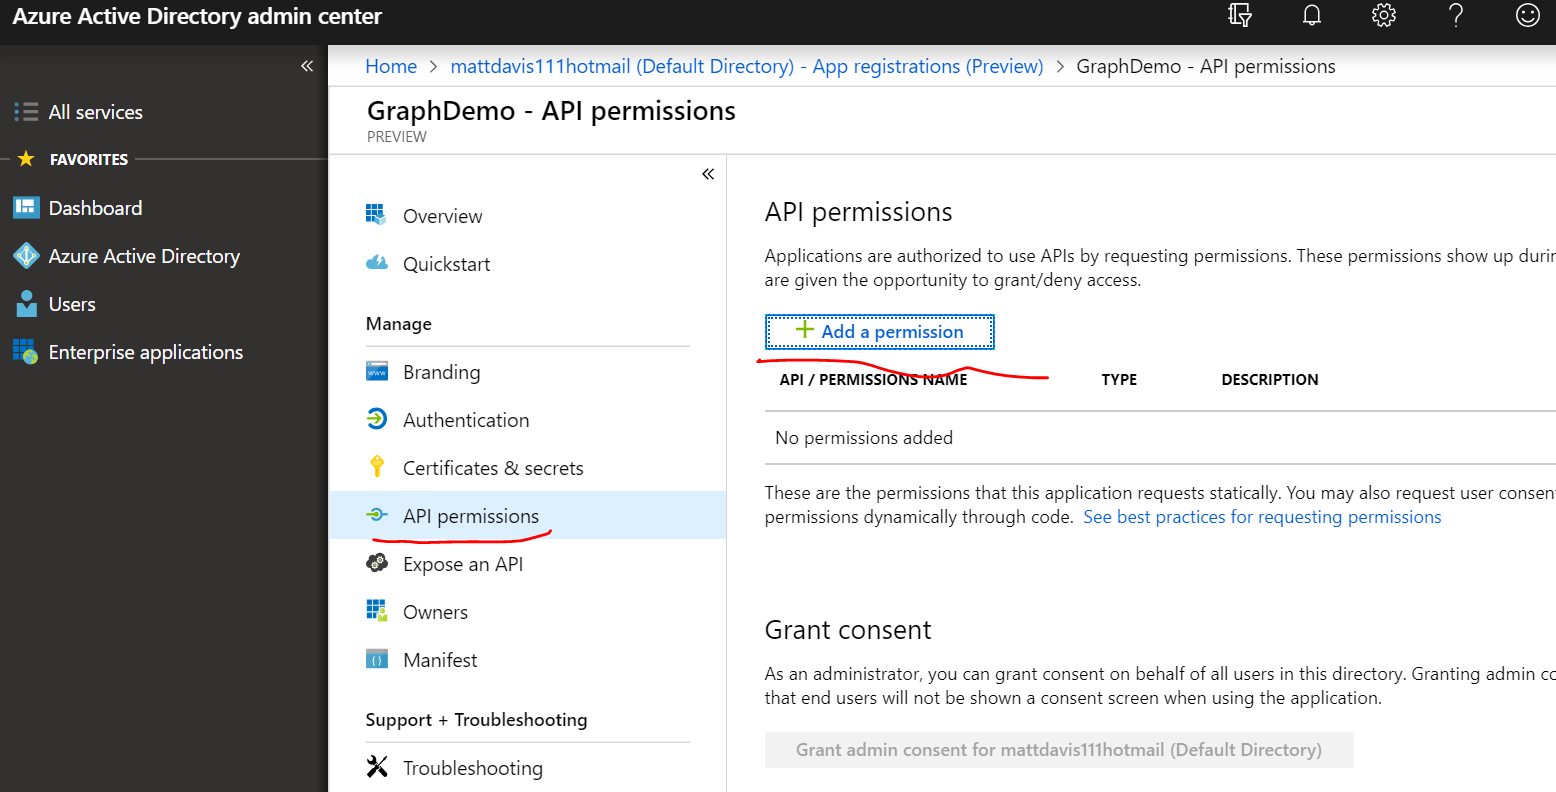
- Click API permissions
- Click Add a permission
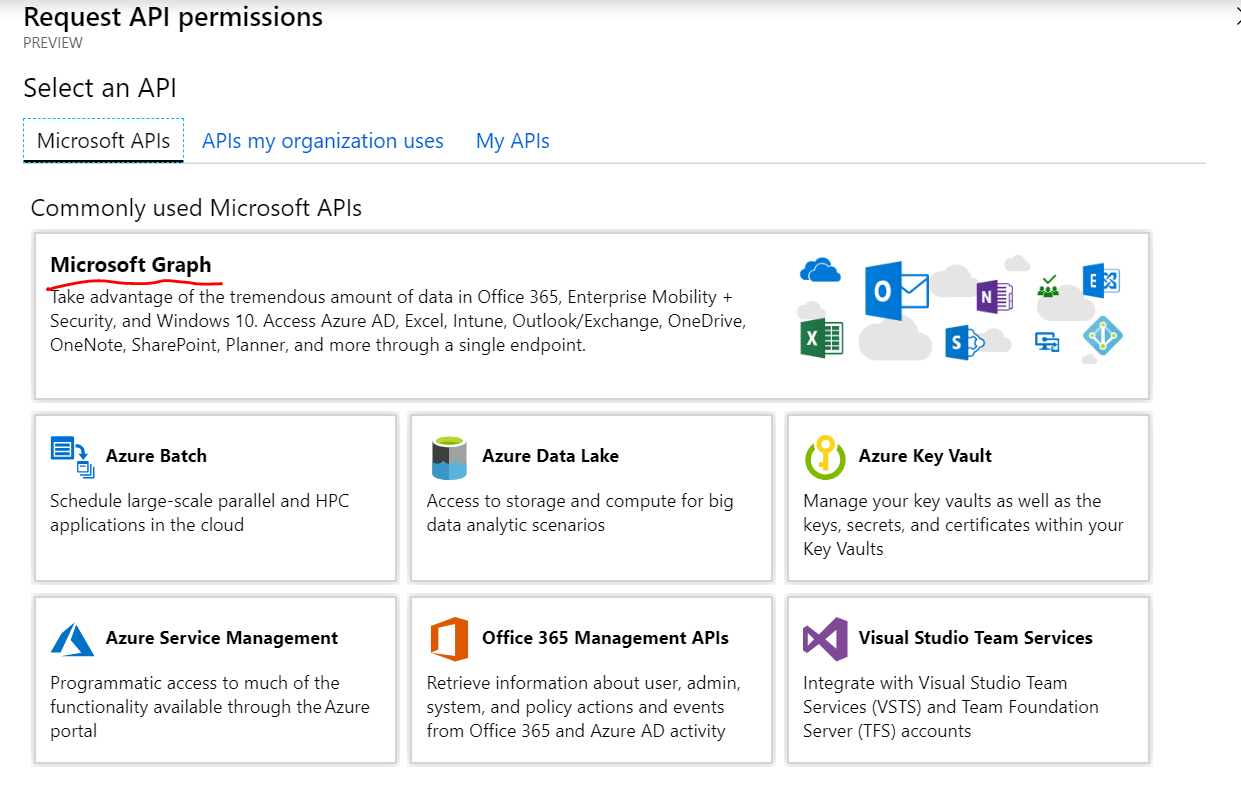
- Click on Microsoft Graph
- Click on Application Permissions
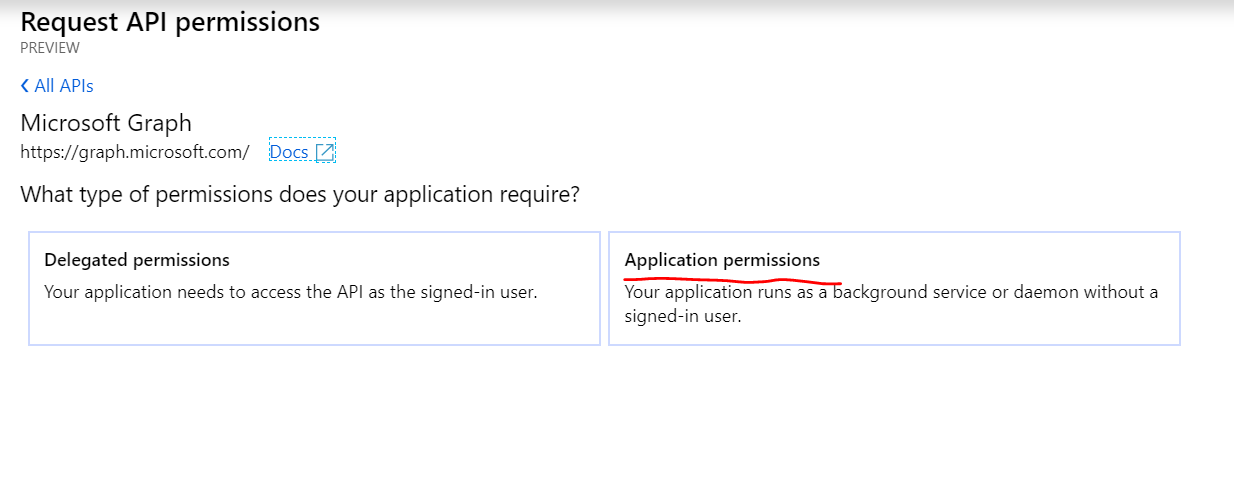
- Select User
- Check User.Read.All
- Click Add Permission

- Click Grant admin consent for…
- Click Yes
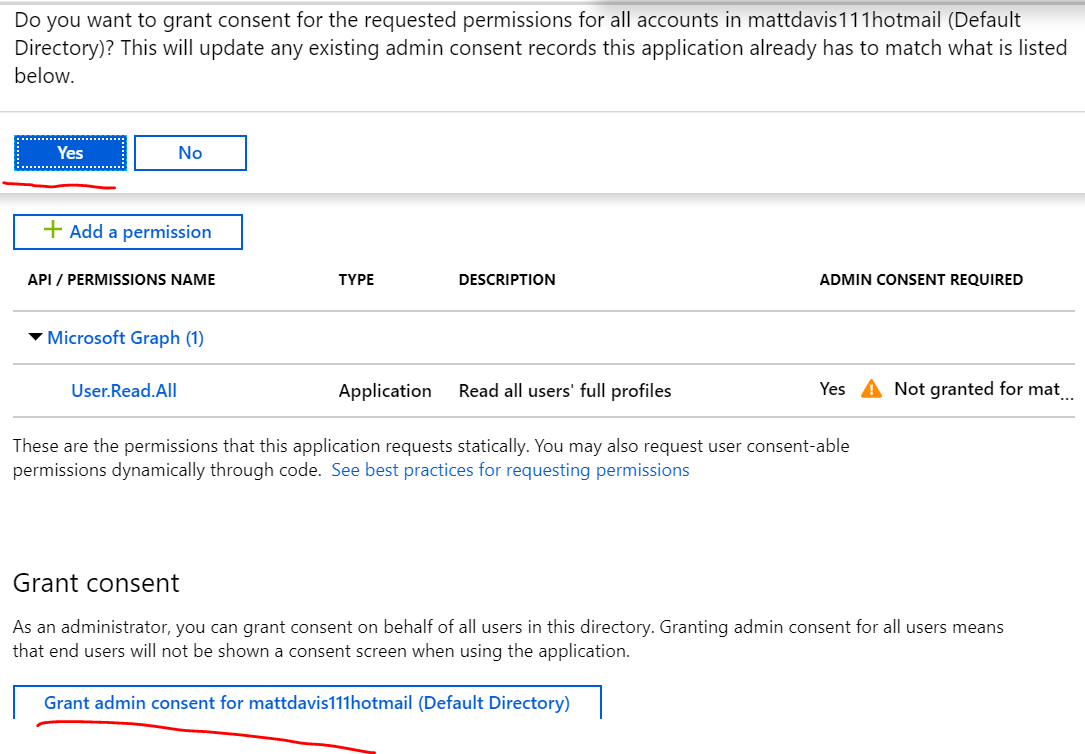
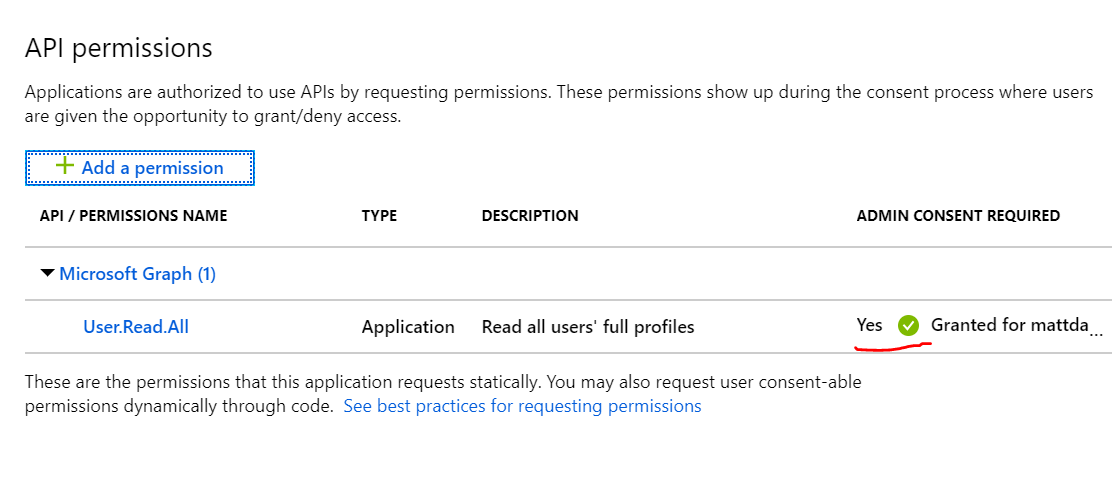
Now you wil see that admin consent has been granted:
PowerShell script
Here’s the full script that will get the access token to the graph, then use that token to make an API call to the graph and get all of the users for that tenant. It will then output the display names of the returned users. The script should be run in the same PowerShell session as the Azure AD application was created in to use the $app.ApplicationId.Guid property, otherwise look at the script break down below to see another way to obtain this if the $app variable is no longer available.
$tenantID =  (Get-AzureRmTenant).Id
$ApplicationClientID = $app.ApplicationId.Guid
$graphUrl = 'https://graph.microsoft.com'
$tokenEndpoint = "https://login.microsoftonline.com/$tenantID/oauth2/token"

$tokenHeaders = @{
  "Content-Type" = "application/x-www-form-urlencoded";
}

$tokenBody = @{
  "grant_type"    = "client_credentials";
  "client_id"     = "$ApplicationClientID";
  "client_secret" = "$ClientSecret";
  "resource"      = "$graphUrl";
}

# Post request to get the access token so we can query the Microsoft Graph (valid for 1 hour)
$response = Invoke-RestMethod -Method Post -Uri $tokenEndpoint -Headers $tokenHeaders -Body $tokenBody

# Create the headers to send with the access token obtained from the above post
$queryHeaders = @{
  "Content-Type" = "application/json"
  "Authorization" = "Bearer $($response.access_token)"
}

# Create the URL to access all the users and send the query to the URL along with authorization headers
$queryUrl = $graphUrl + "/v1.0/users"
$userList = Invoke-RestMethod -Method Get -Uri $queryUrl -Headers $queryHeaders

# Output the displaynames
Write-Output $userList.value.displayName
Script break down
The variables are set as followed
- TenantID is set from the output of Get-AzureRMTenant
- ApplicationClientID is set from the variable app, that was the output from the New-AzureRmADApplication
- This is the url of the graph
- Create the token endpoint from the tenantID variable value and the URL provided by Microsoft
Note: if you had to restart the session, you can populate the ApplicationClientID variable by running the following (if you named the Azure AD application GraphDemo). You’ll also have to set the ClientSecret string again.
$ApplicationClientID = (Get-AzureRmADApplication -DisplayName GraphDemo).ApplicationId.Guid
$ClientSecret = 'RandomStringThatWasSavedSecurelyHere'
Now the headers are created along with the body that is sent to Azure AD. If all details are valid, the response is returned which contains the access token.
# Login to AzureRM if needed with Add-AzureRmAccount
$tenantID =  (Get-AzureRmTenant).Id
$ApplicationClientID = $app.ApplicationId.Guid
$graphUrl = 'https://graph.microsoft.com'
$tokenEndpoint = "https://login.microsoftonline.com/$tenantID/oauth2/token"

$tokenHeaders = @{
  "Content-Type" = "application/x-www-form-urlencoded";
}

$tokenBody = @{
  "grant_type"    = "client_credentials";
  "client_id"     = "$ApplicationClientID";
  "client_secret" = "$ClientSecret";
  "resource"      = "$graphUrl";
}

# Post request to get the access token so we can query the Microsoft Graph (valid for 1 hour)
$response = Invoke-RestMethod -Method Post -Uri $tokenEndpoint -Headers $tokenHeaders -Body $tokenBody
Now that the access token has been received, it is added to the headers that will be sent to the query URL. The query URL is the URL of the graph, along with the data that you want to receive (See the graph explorer to view the URLs that can be appended to get different data back).
The results are stored in the userList variable.
# Create the headers to send with the access token obtained from the above post
$queryHeaders = @{
  "Content-Type" = "application/json"
  "Authorization" = "Bearer $($response.access_token)"
}

# Create the URL to access all the users and send the query to the URL along with authorization headers
$queryUrl = $graphUrl + "/v1.0/users"
$userList = Invoke-RestMethod -Method Get -Uri $queryUrl -Headers $queryHeaders
The Get-Member Cmdlet shows the properties of the pscustomobject that stores the results from the API call to the graph.
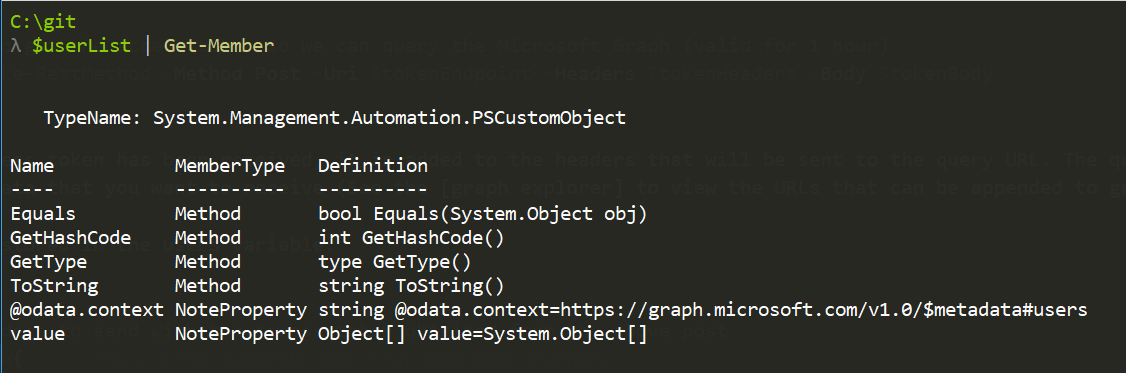
The value Noteproperty contains an object, so expanding that value property gives the data requested.
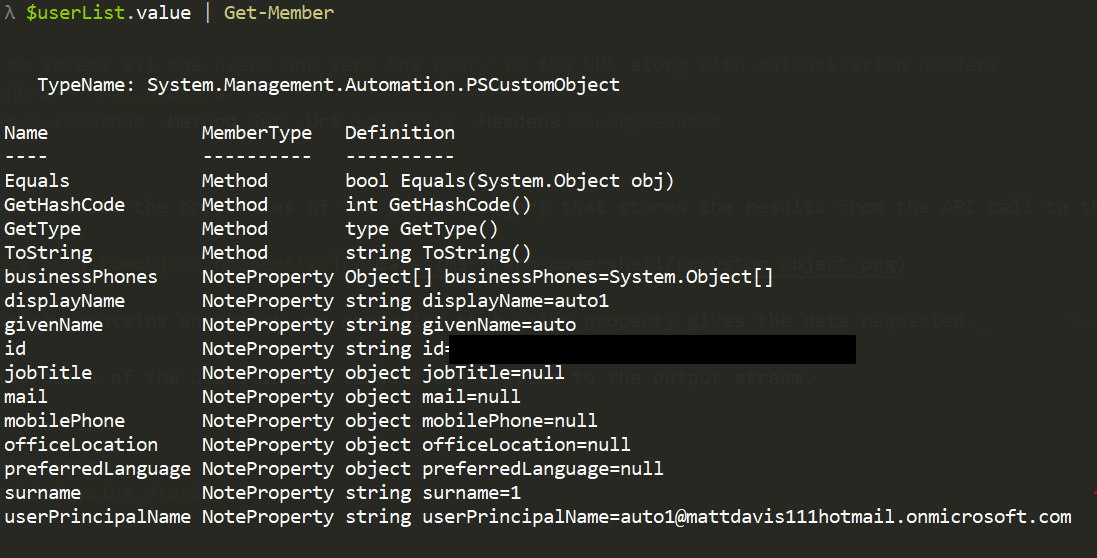
Piping that to Get-Member shows all of the available data received.
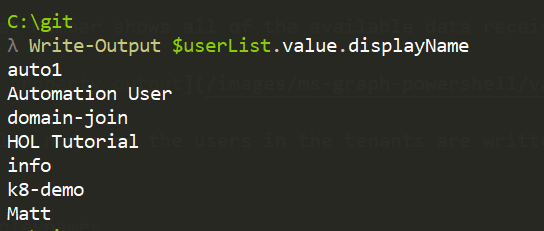
Finally the display names of the users in the tenants are written to the output stream.
# Output the displaynames
Write-Output $userList.value.displayName
Summary
This post has shown how to set up an Azure AD application and then use it to authenticate against the application to gain access to the Microsoft graph API using PowerShell. The graph holds a rich collection of data and being able to query with PowerShell is useful to allow integration with other applications such as Slack, Azure Automation Runbooks, Azure functions (V1 of functions still currently support PowerShell) etc. With the correct permissions and query URLs you could adapt the above script to get lots of different data and alos send put requests to update entities in Azure AD. Version 2 of the graph is a work in progress and hopefully even more of the API will be exposed soon.
For me personally, this was a fun start to the project and wanted to get it written down here for future use and the up and coming hackathon.